![]()


Locate your eSIM in your account or confirmation email
Install within 12 months from purchase
Activate upon arrival at your destination
⚠Important
Ensure Data Roaming is ON for the eSIM installed.
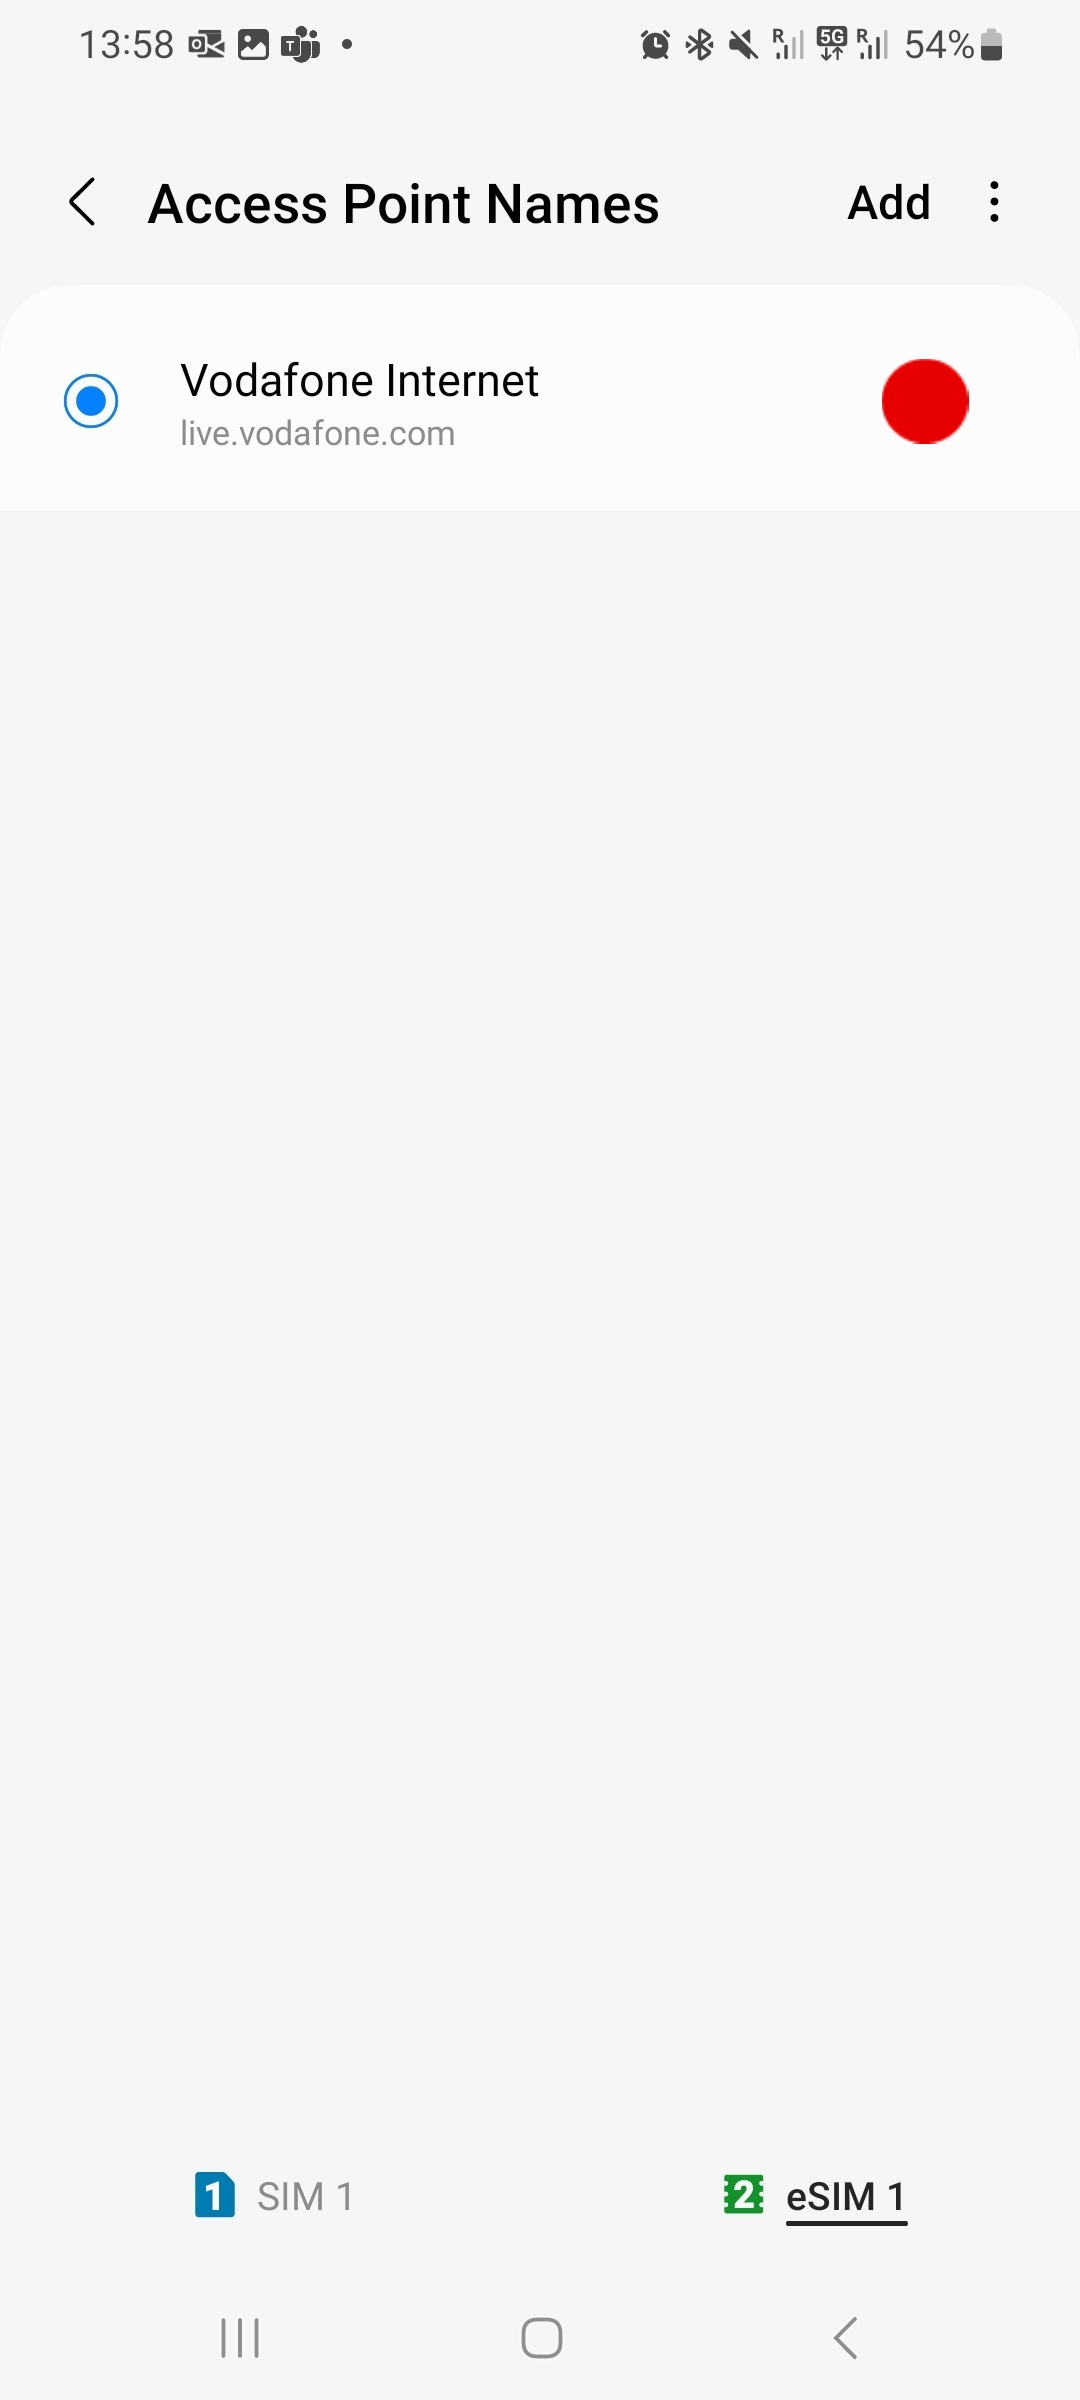
Ensure that the APN setting for the eSIM is pointing to 'live.vodafone.com'. Refer to installation steps below.
Do not remove the eSIM from your device as you will not be able to use it again.
Device type
Select the type of device on which you want to use your eSIM


Installation type
If you can display QR code on another screen select Installation with QR code, otherwise select manual
installation.
Important information you need to know before you start.
Important
- Locate your eSIM details in your account or confirmation email.
- You must have the QR code on another screen or device to scan it with your phone camera.
- Make sure you have a stable internet connection throughout the process.
Install before you travel
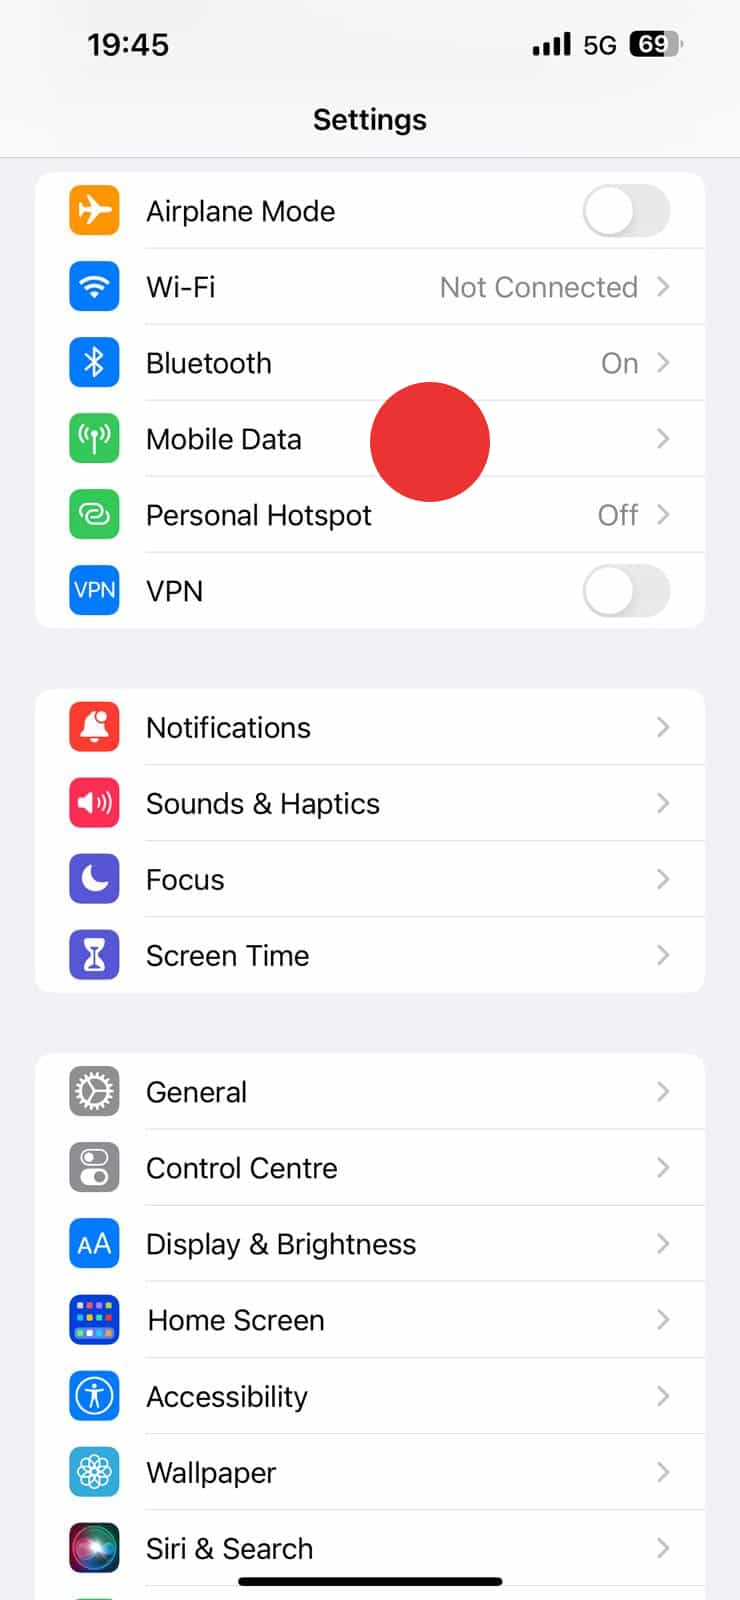
- Option 1: Open 'Settings', tap on 'Mobile data.
- Option 2: Alternatively, use your camera to scan the QR code directly

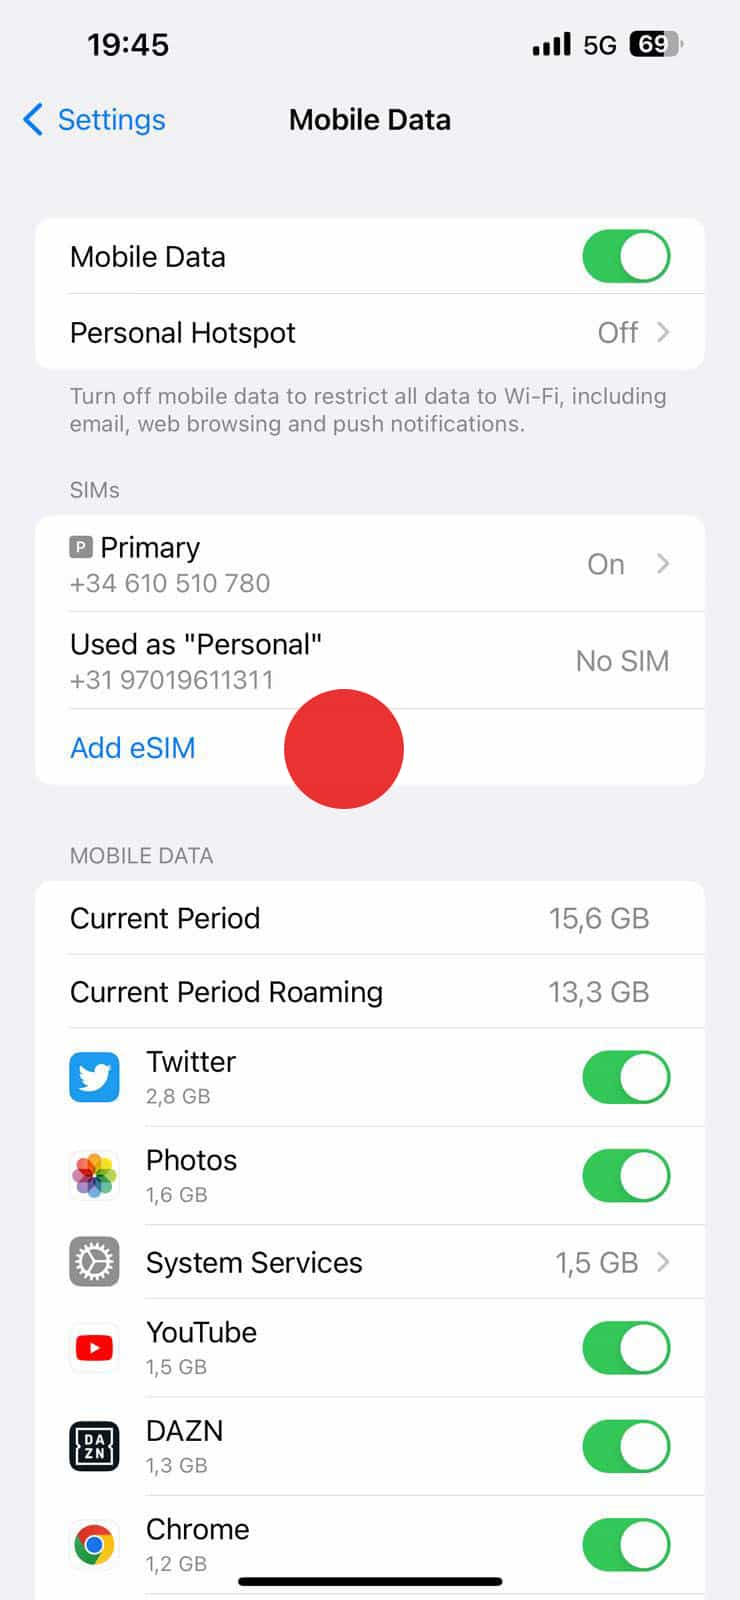
- From the 'Mobile data' settings, select 'Add eSIM.'

- Click on 'Use QR Code' and scan the QR code received after purchase.

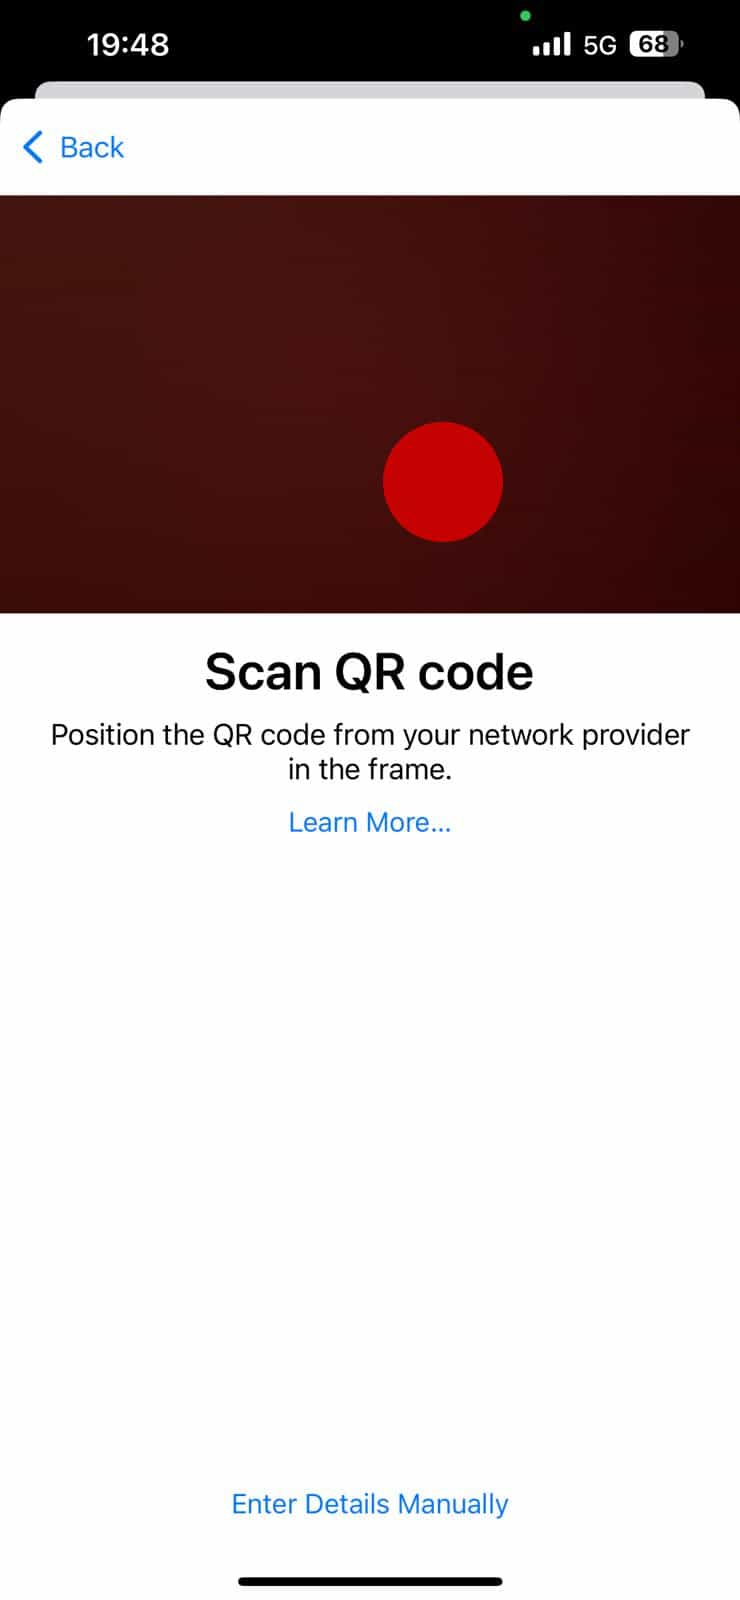
- Scan the QR code.
- Make sure to have a stable internet connection for eSIM download & installation
- Note: You may require another device to display the QR code for scanning.

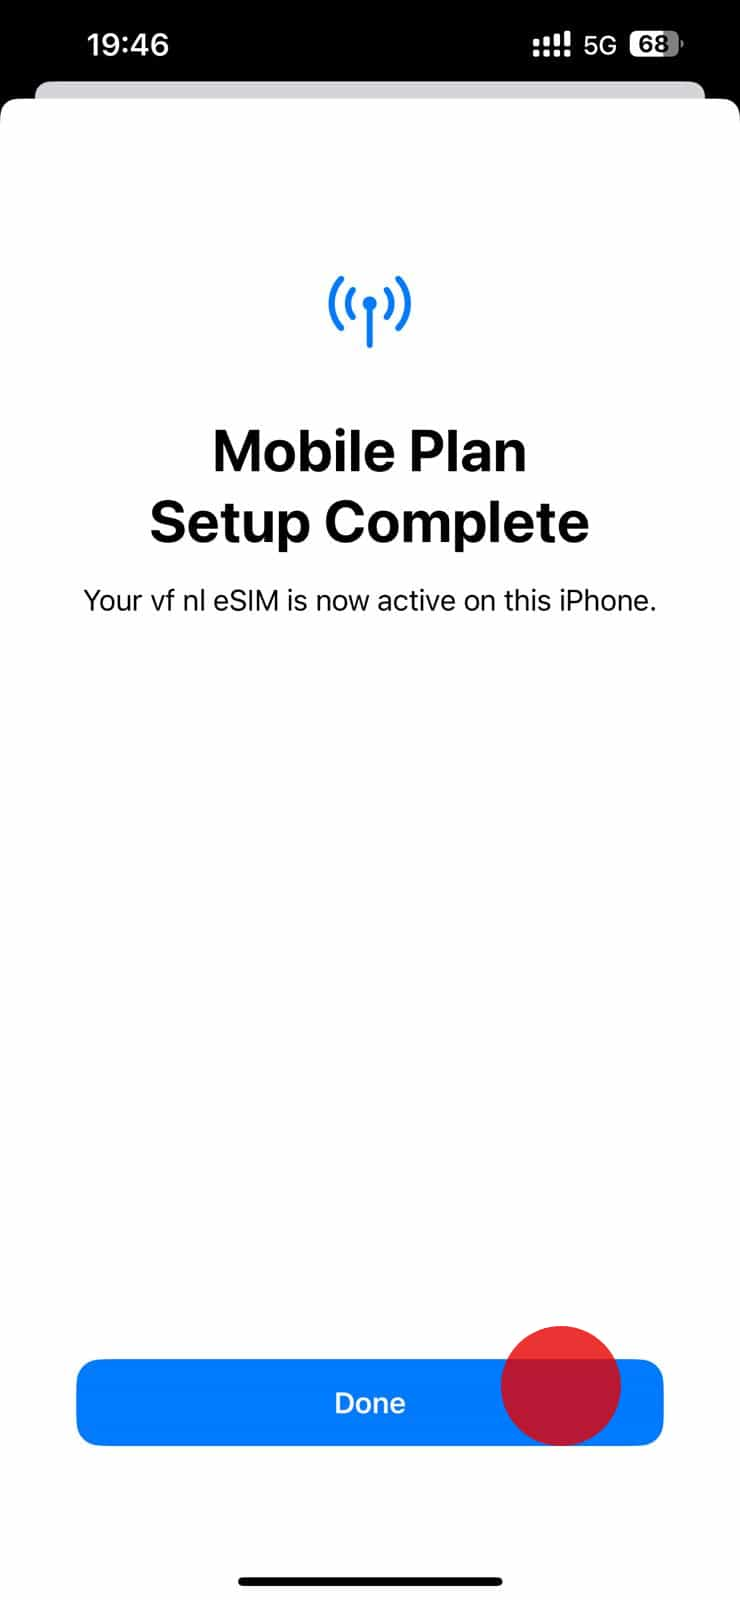
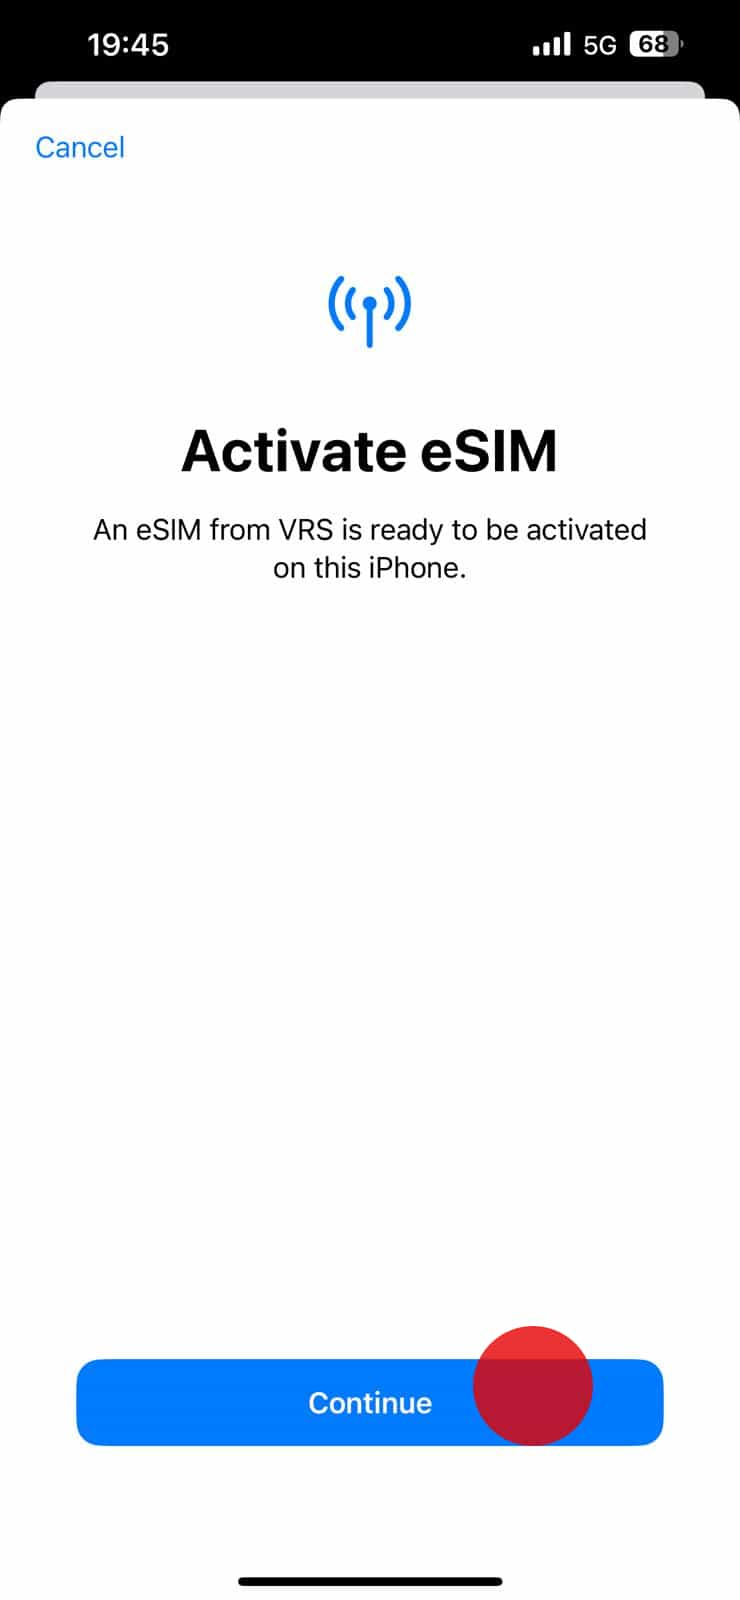
- Click on 'Continue' to add the eSIM to your phone.
- Note: This step may take a couple of minutes. If you close the installation screen, you can check the installation status of your new eSIM under Settings – Mobile Service - SIMs.

- Congratulations! Your Airtel-Vodafone eSIM is successfully installed now. Please follow the instructions on the Activation journey in order to activate your plan. We recommend you to do this during your trip or upon arrival to your destination. If you have any questions or encounter any issues, refer to the troubleshooting section or contact our support team for assistance. Enjoy your seamless travel experience with Airtel-Vodafone eSIM!
Activate during flight or upon arrival at your destination.
Important
Remember to complete this configuration, otherwise you may incur roaming costs
on your original SIM
- Open the 'Settings' on your device.
- Tap on 'Mobile data'.
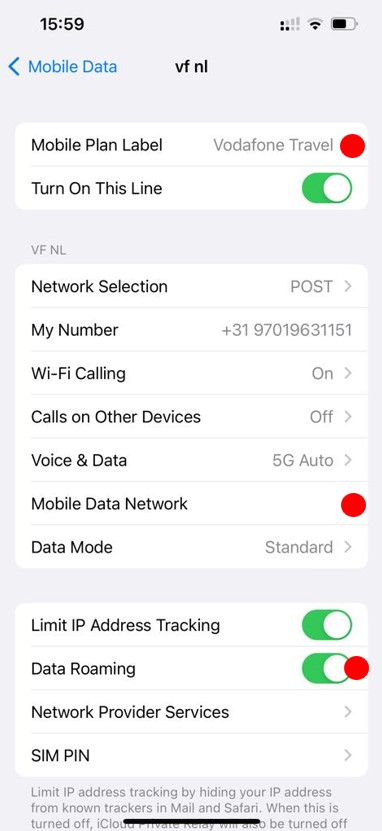
- Within the 'Mobile data' settings, locate your eSIM under ‘SIMs’
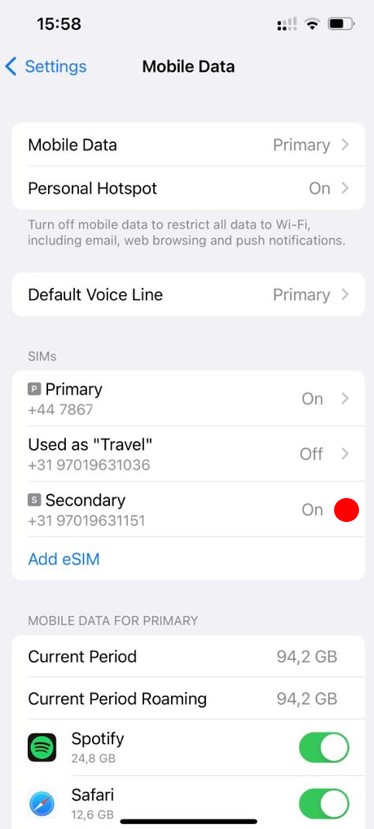
- Tap on ‘Mobile Plan Label’ to label your new Airtel-Vodafone eSIM as you desire.
- We recommend using a format like 'Airtel-Vodafone Travel’
- Click on ‘Mobile Data Network’ to ensure the right APN is configured. Validate that you have ‘live.vodafone.com’ selected here
- Switch on “Data Roaming” option.

- Open the 'Settings' on your device.
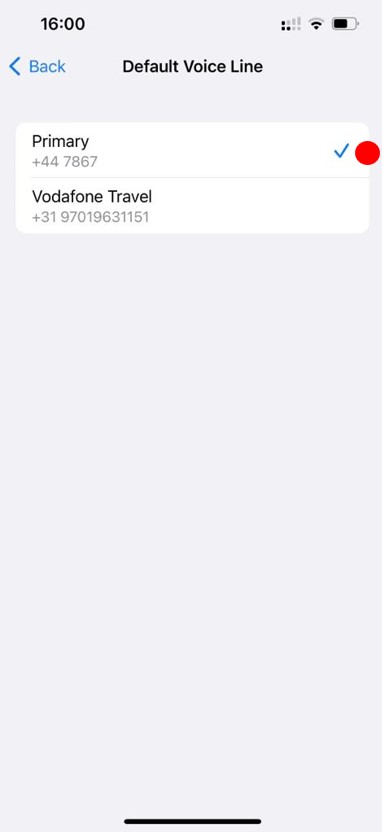
- Tap on ‘Default Voice Line’.
- Keep your home provider SIM as default line for voice for calls and texts.
- Open the 'Settings' on your device.
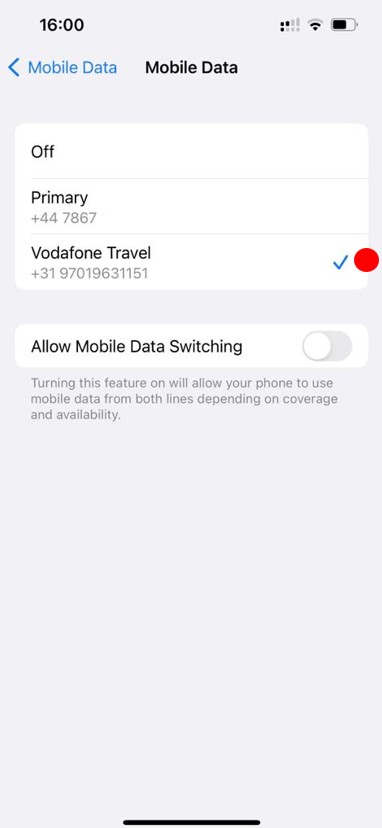
- Tap on 'Mobile data’.
- Select your new Airtel-Vodafone eSIM as default line for mobile data.
- Your Airtel-Vodafone eSIM is now ready to connect to the network.
Important information you need to know before you start.
Important
- Locate your eSIM details in your account or confirmation email.
- You must have the QR code on another screen or device to scan it with your phone camera.
- Make sure you have a stable internet connection throughout the process.
Install before you travel
- Open 'Settings', tap on 'Mobile data.'
- From the 'Mobile data' settings, select 'Add eSIM.'
- Click on 'Use QR Code' and scan the QR code received after purchase.
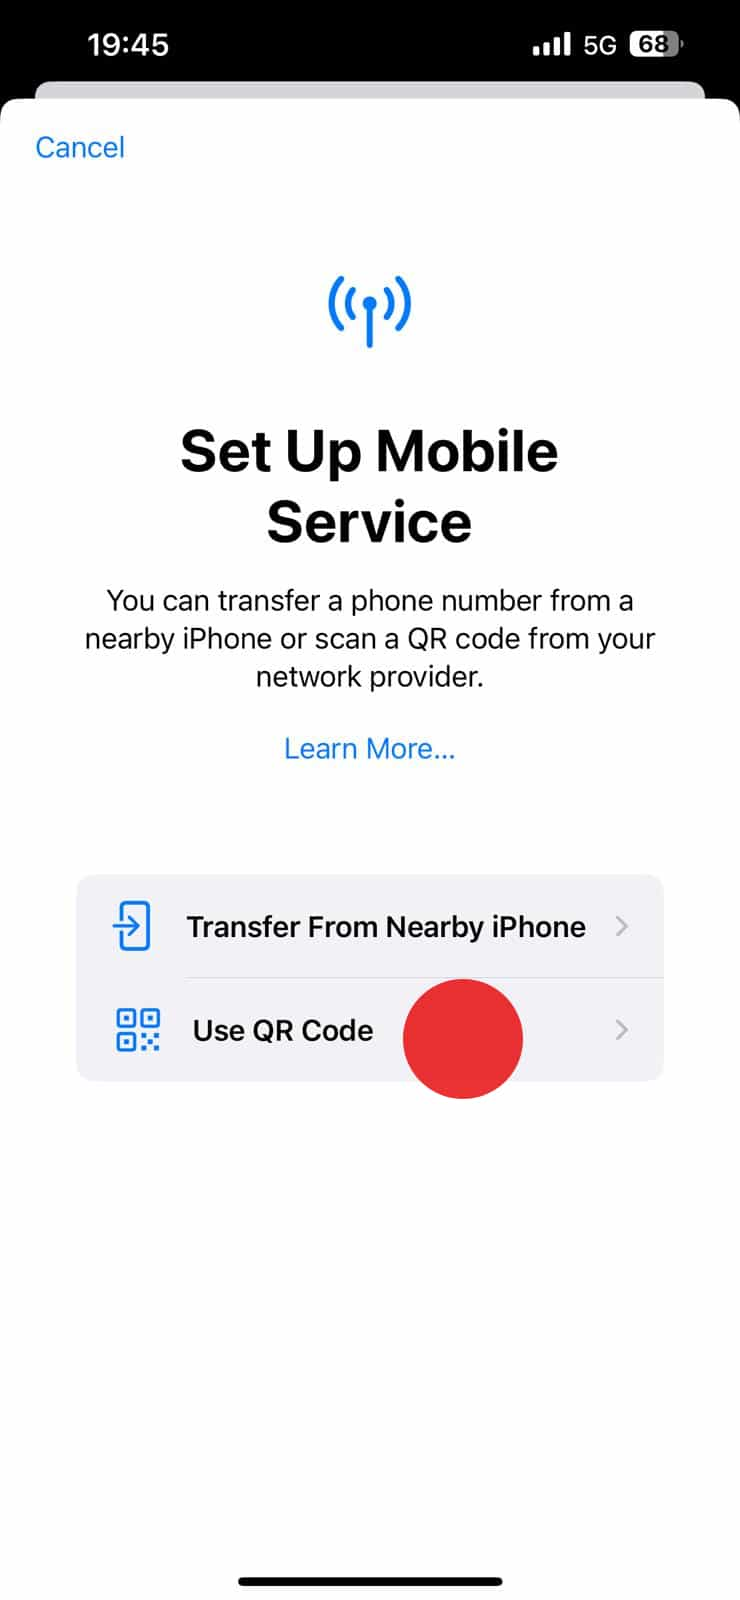
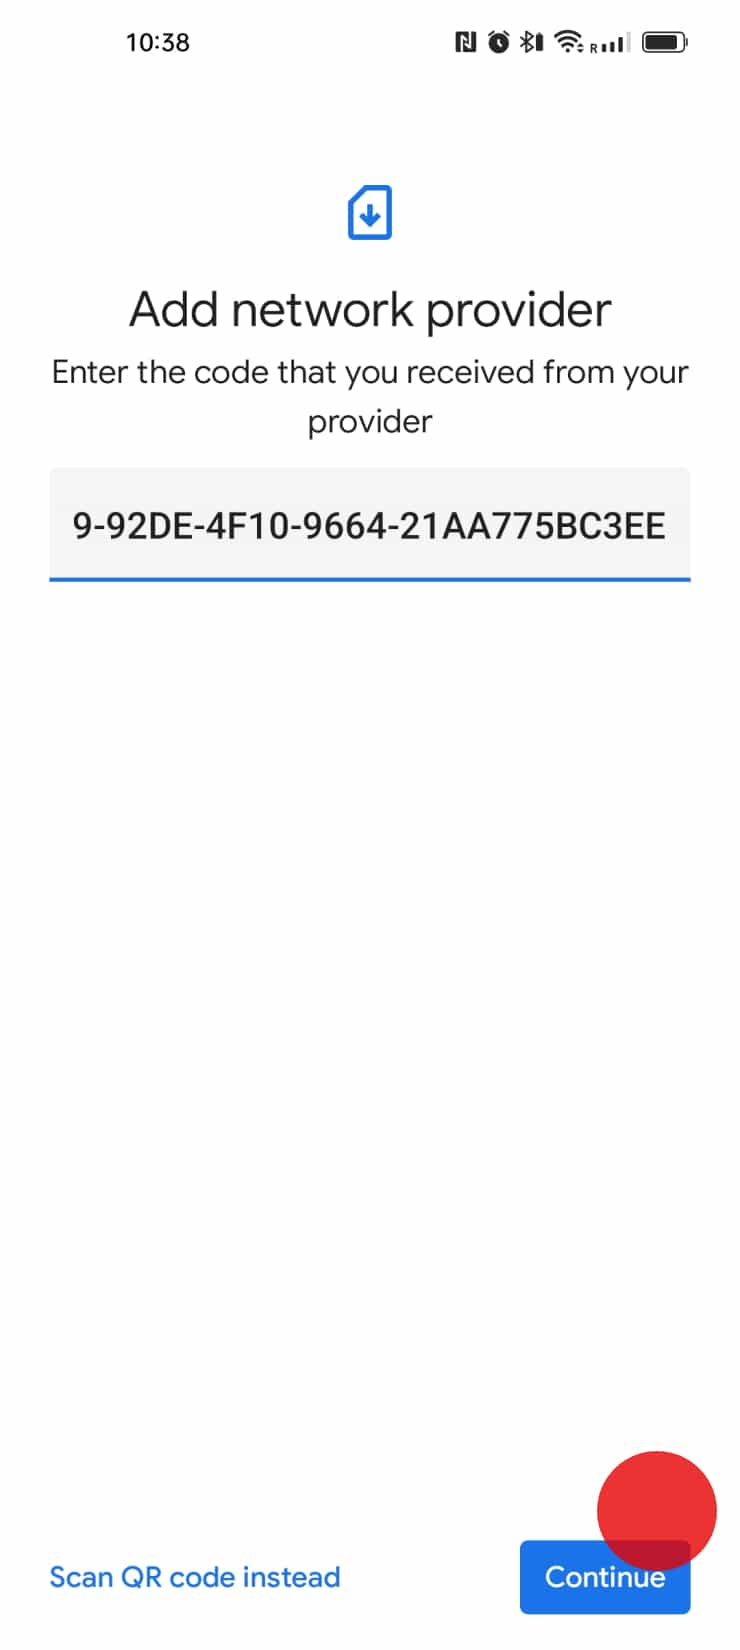
- Click on 'Enter details manually.'
- Input the codes received in your email or in your account.
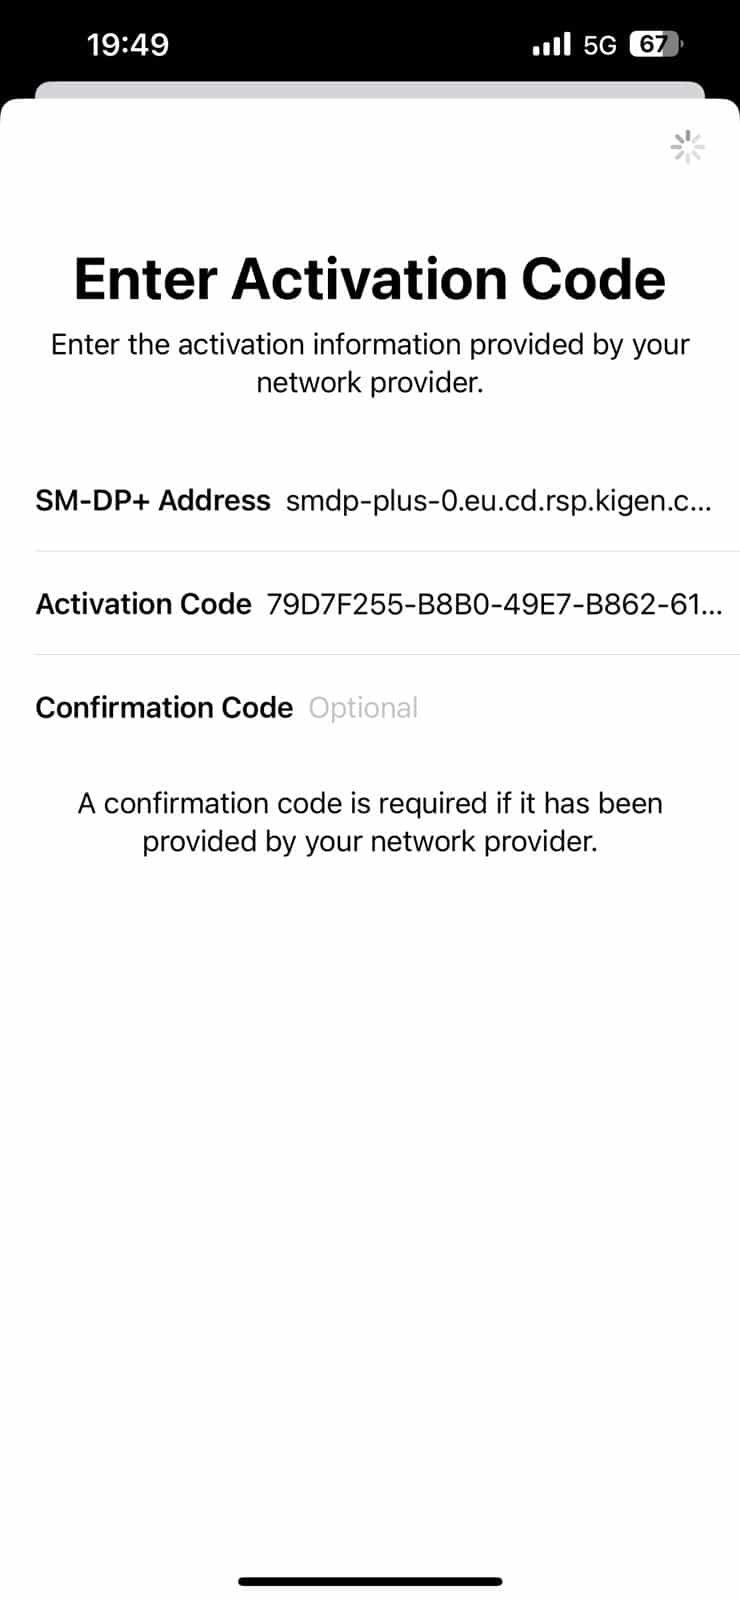
- Click on 'Continue' to add the eSIM to your phone.
- Note: This step may take a couple of minutes. If you close the installation screen, you can check the installation status of your new eSIM under Settings – Mobile Service - SIMs.
- Congratulations! Your Airtel-Vodafone eSIM is successfully installed now. Please follow the instructions on the Activation journey in order to activate your plan. We recommend you to do this during your trip or upon arrival to your destination. If you have any questions or encounter any issues, refer to the troubleshooting section or contact our support team for assistance. Enjoy your seamless travel experience with Airtel-Vodafone eSIM!

Activate during flight or upon arrival at your destination.
Important
Remember to complete this configuration, otherwise you may incur roaming costs
on your original SIM
- Open the 'Settings' on your device.
- Tap on 'Mobile data'.
- Within the 'Mobile data' settings, locate your eSIM under ‘SIMs’

- Tap on ‘Mobile Plan Label’ to label your new Airtel-Vodafone eSIM as you desire.
- We recommend using a format like 'Airtel-Vodafone Travel’
- Click on ‘Mobile Data Network’ to ensure the right APN is configured. Validate that you have ‘live.vodafone.com’ selected here
- Switch on “Data Roaming” option.
- Open the 'Settings' on your device.
- Tap on ‘Default Voice Line’.
- Keep your home provider SIM as default line for voice for calls and texts.

- Open the 'Settings' on your device.
- Tap on 'Mobile data’.
- Select your new Airtel-Vodafone eSIM as default line for mobile data.
- Your Airtel-Vodafone eSIM is now ready to connect to the network.

Installation type
If you can display QR code on another screen select Installation with QR code, otherwise select manual installation.
Important information you need to know before you start.
Important
- Locate your eSIM details in your account or confirmation email.
- You must have the QR code on another screen or device to scan it with your phone camera.
- Make sure you have a stable internet connection throughout the process.
Install before you travel
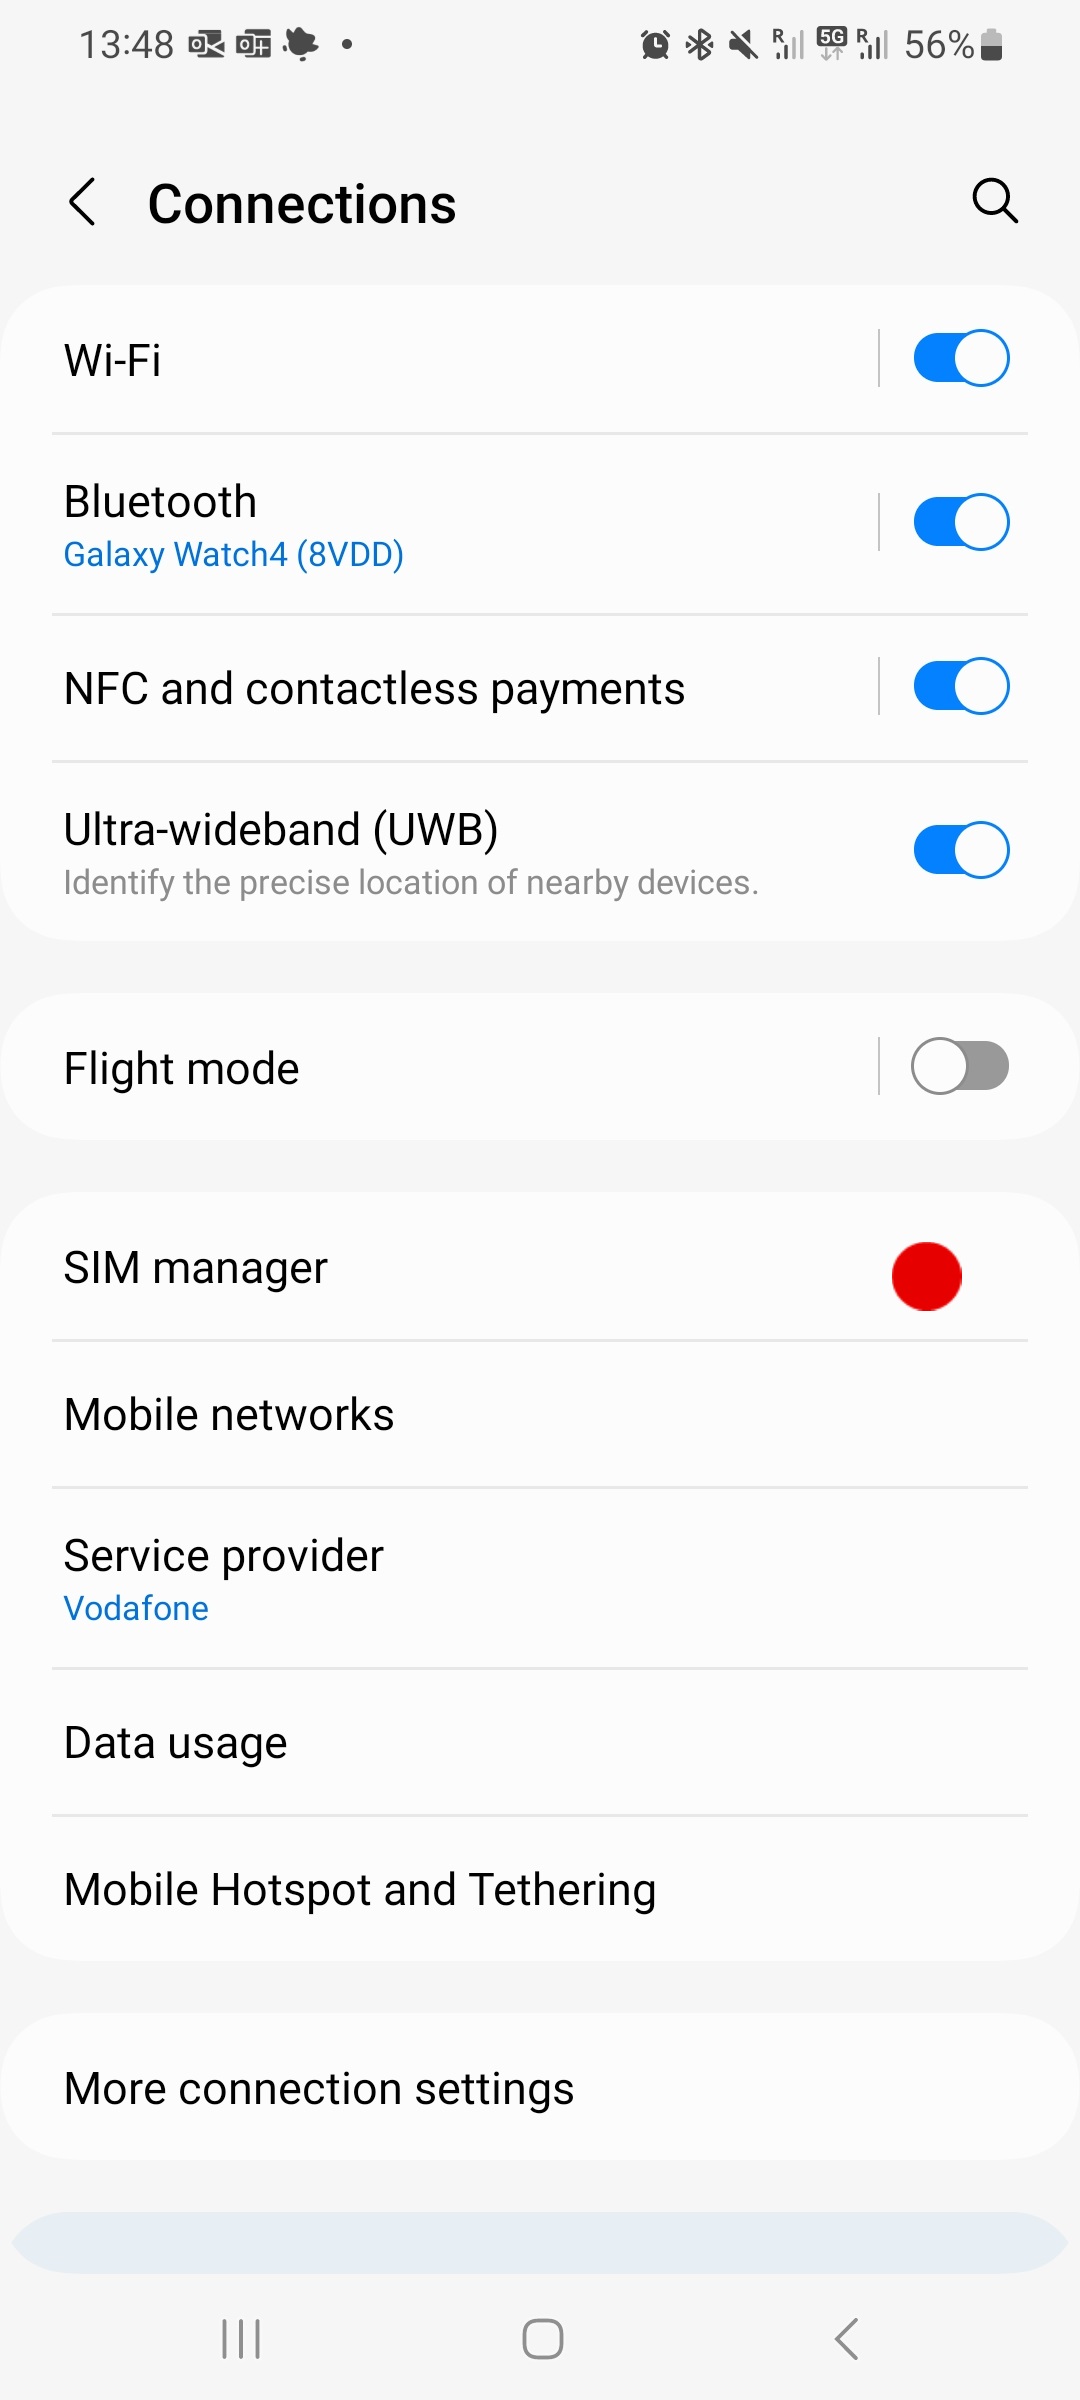
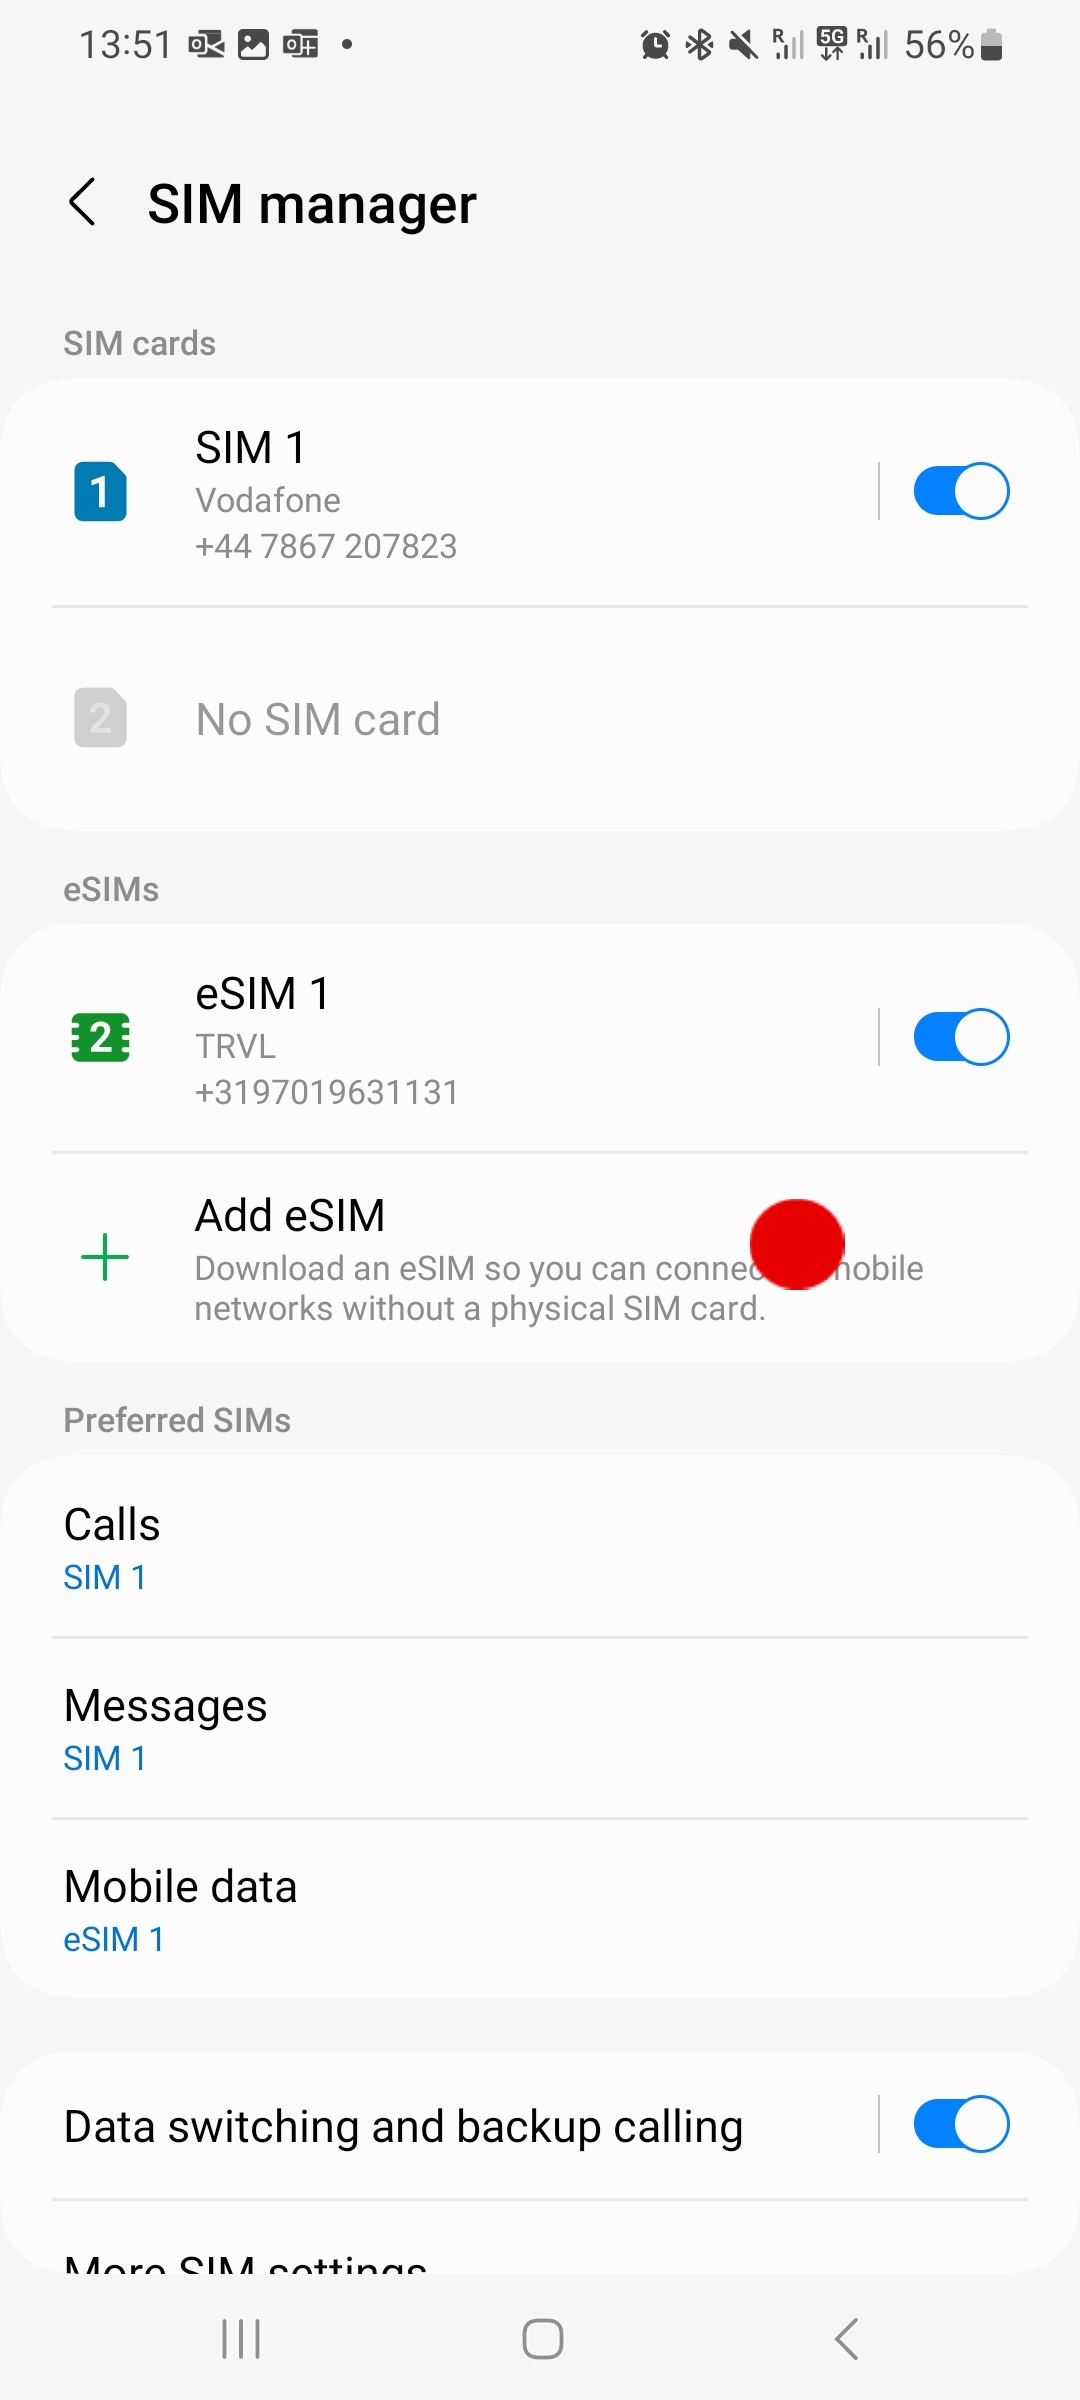
- Open 'Settings', tap on 'Connections'
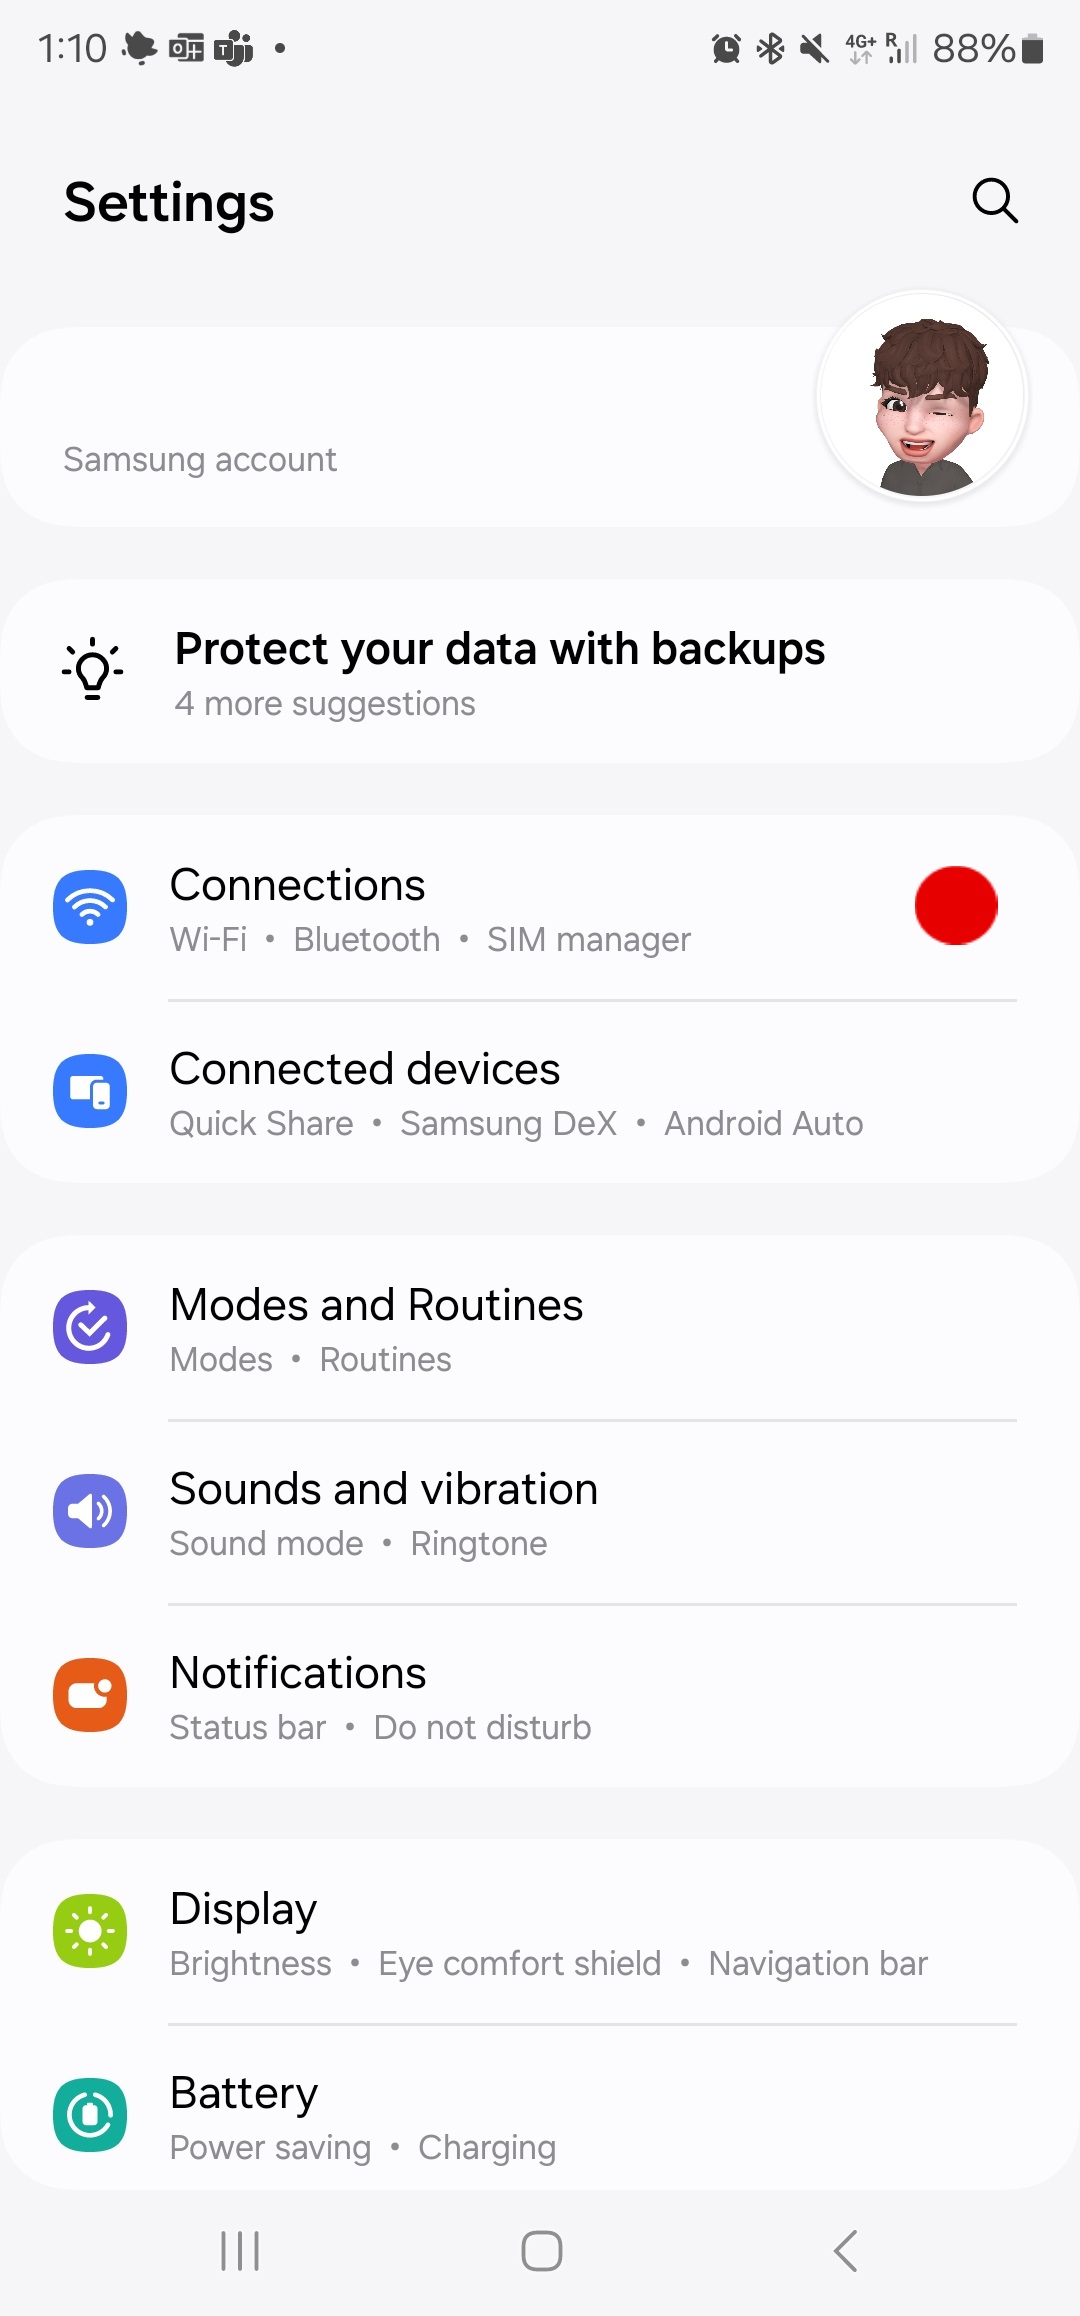
- From the 'Connections' tap on 'SIM Manager' and select 'SIM Manager'
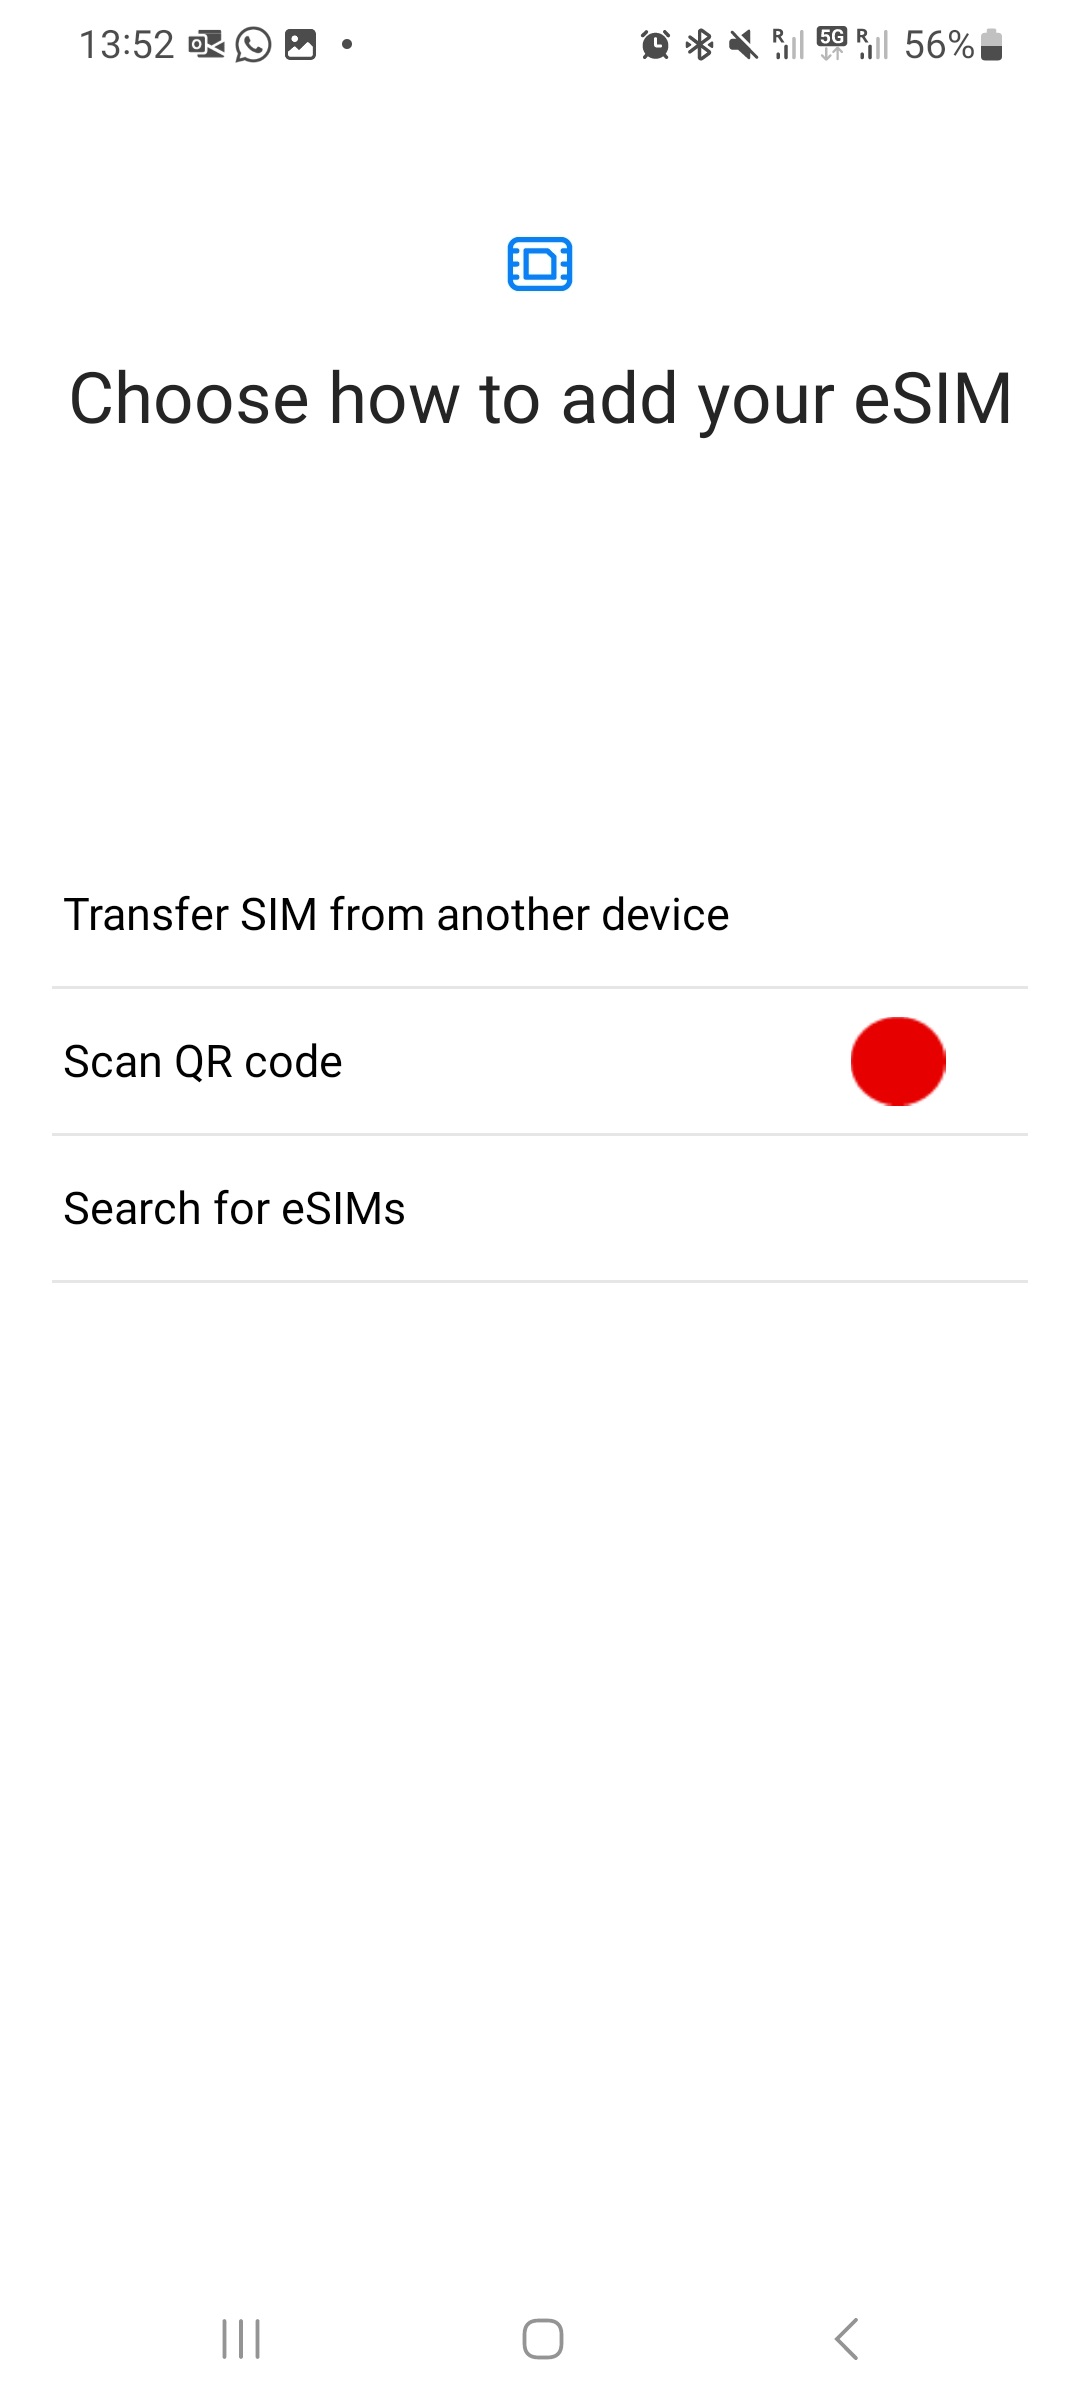
- Select 'Add eSIM'

- Scan QR code
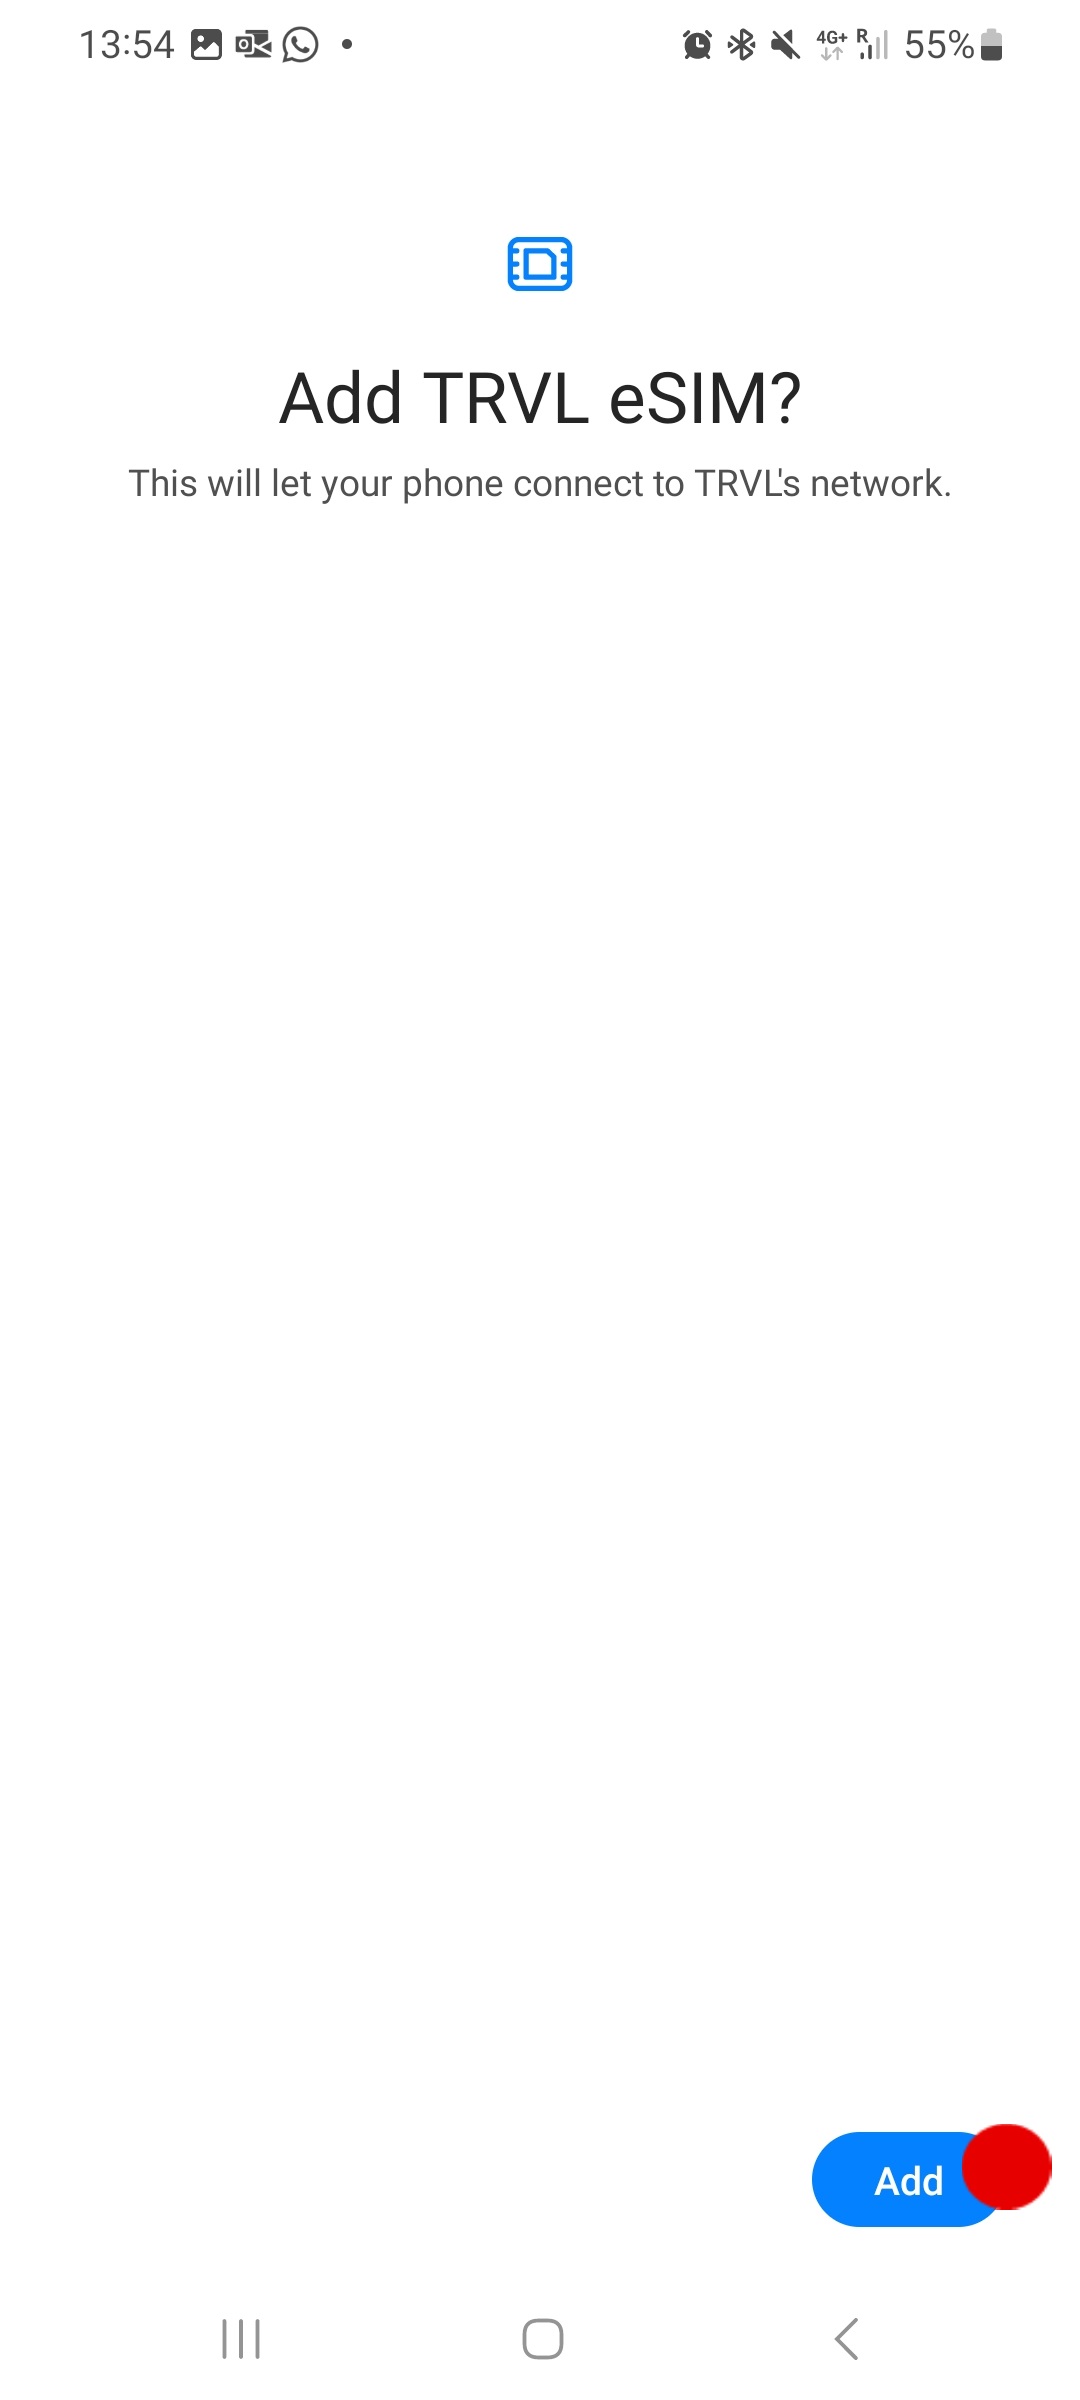
- Select 'Add' to install your eSIM.
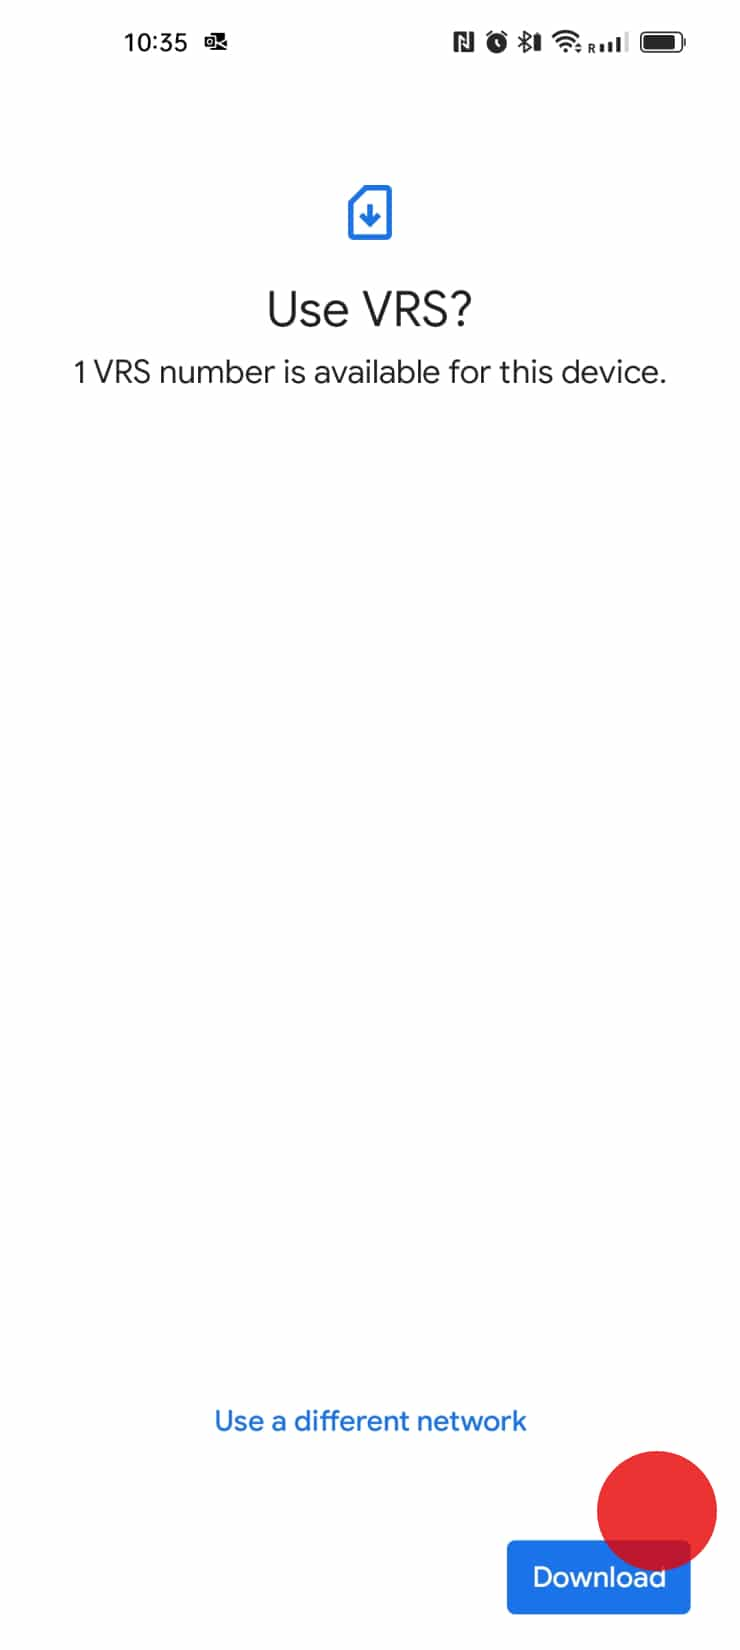
- Note: You need a stable internet connection, and you might require another phone or device to scan your QR code from.
- Click on ‘Download’ to add the eSIM to your phone.

- Congratulations! Your Airtel-Vodafone eSIM is successfully installed now. Please follow the instructions on the Activation journey in order to activate your plan. We recommend you to do this during your trip or upon arrival to your destination. If you have any questions or encounter any issues, refer to the troubleshooting section or contact our support team for assistance. Enjoy your seamless travel experience with Airtel-Vodafone eSIM!

Activate upon arrival at your destination.
Important
Remember to complete this configuration, otherwise you may incur roaming costs
on your original SIM
- Open the 'Settings' on your device.
- Tap on 'Connections'.

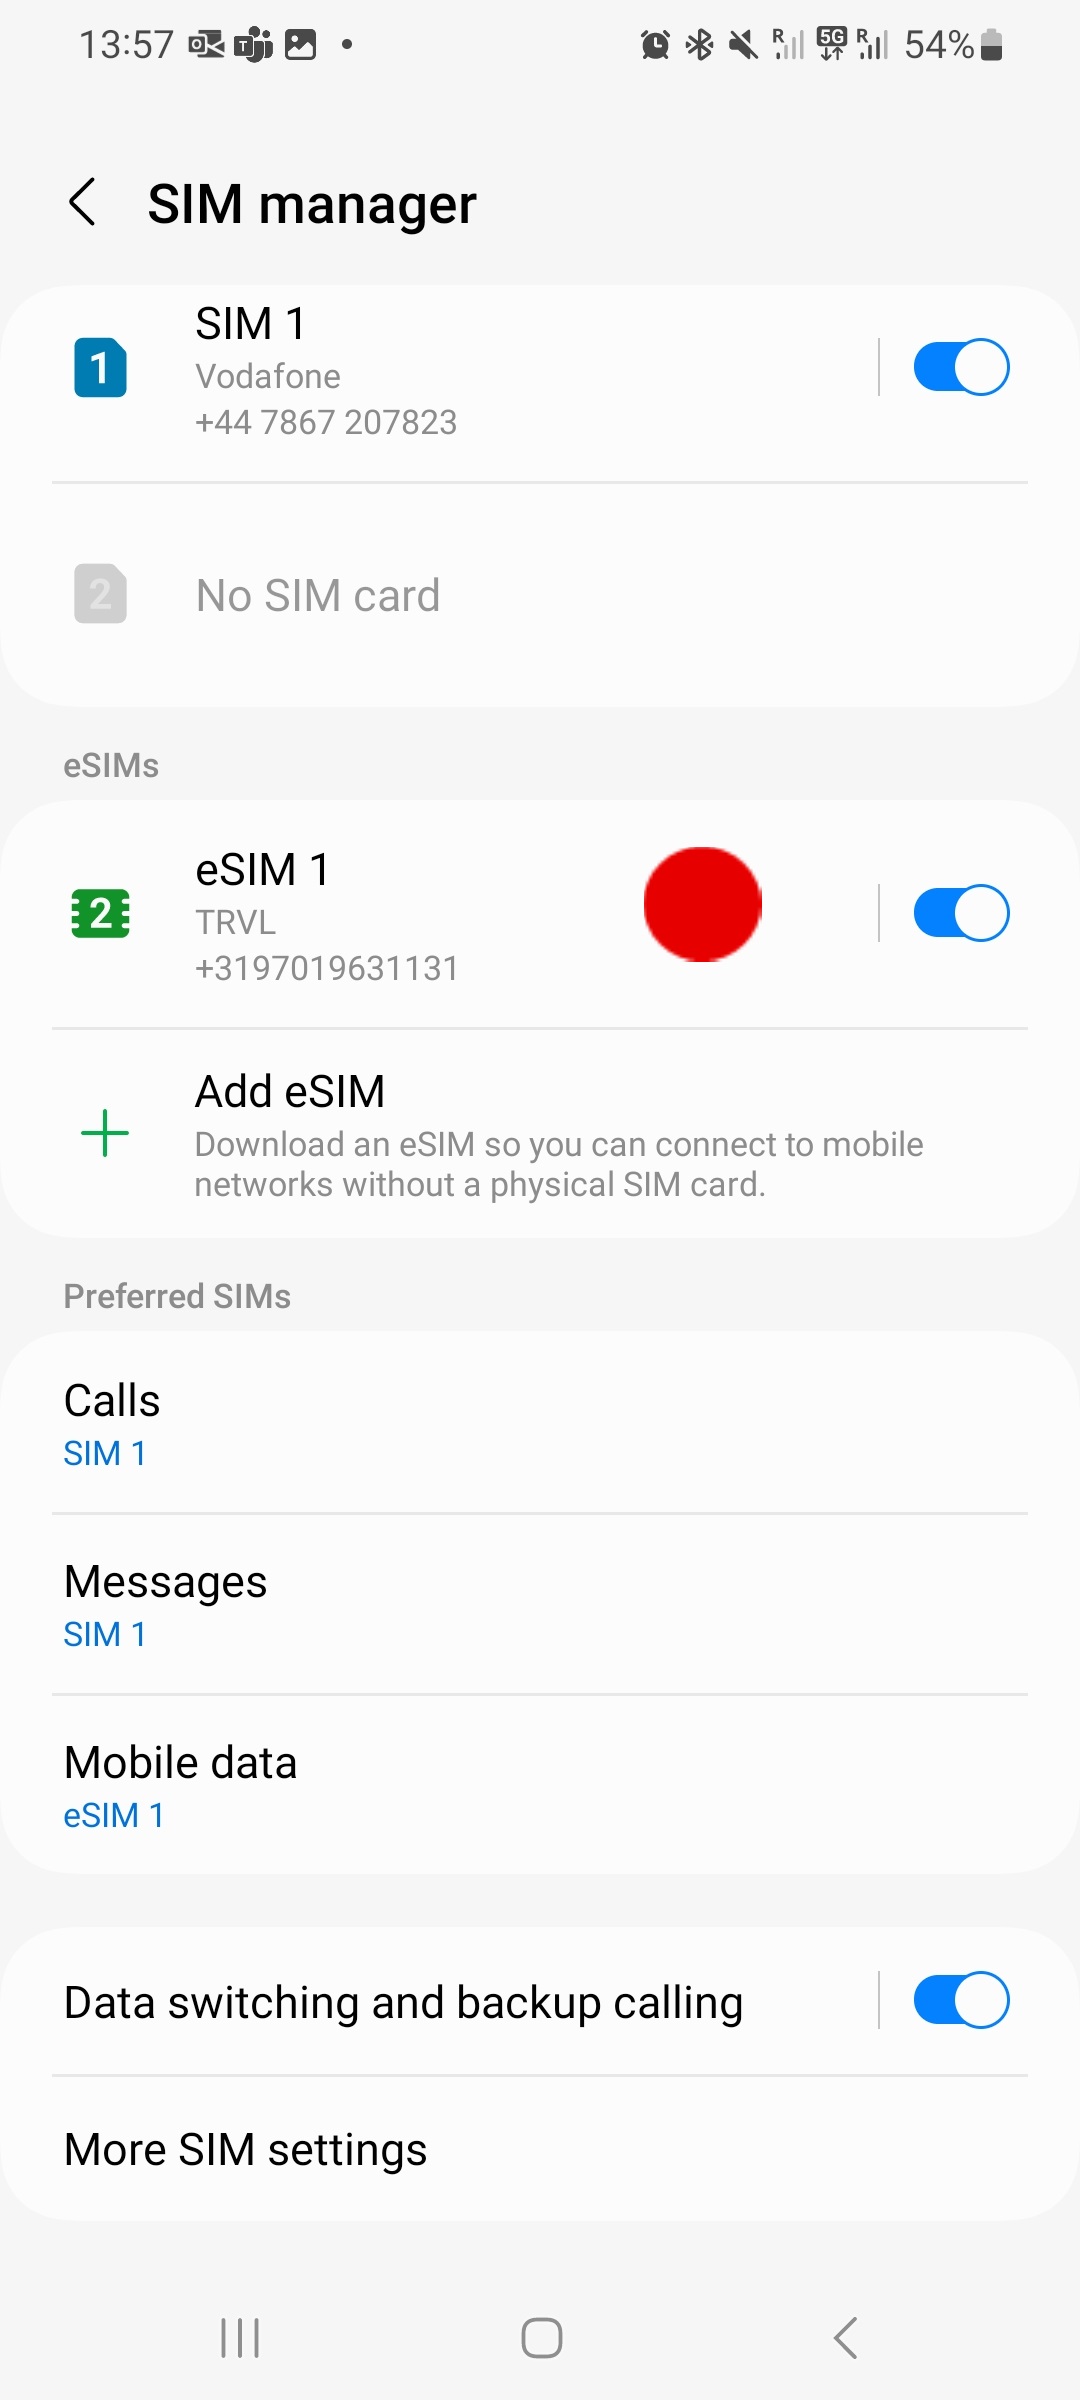
- Select 'SIM Manager'
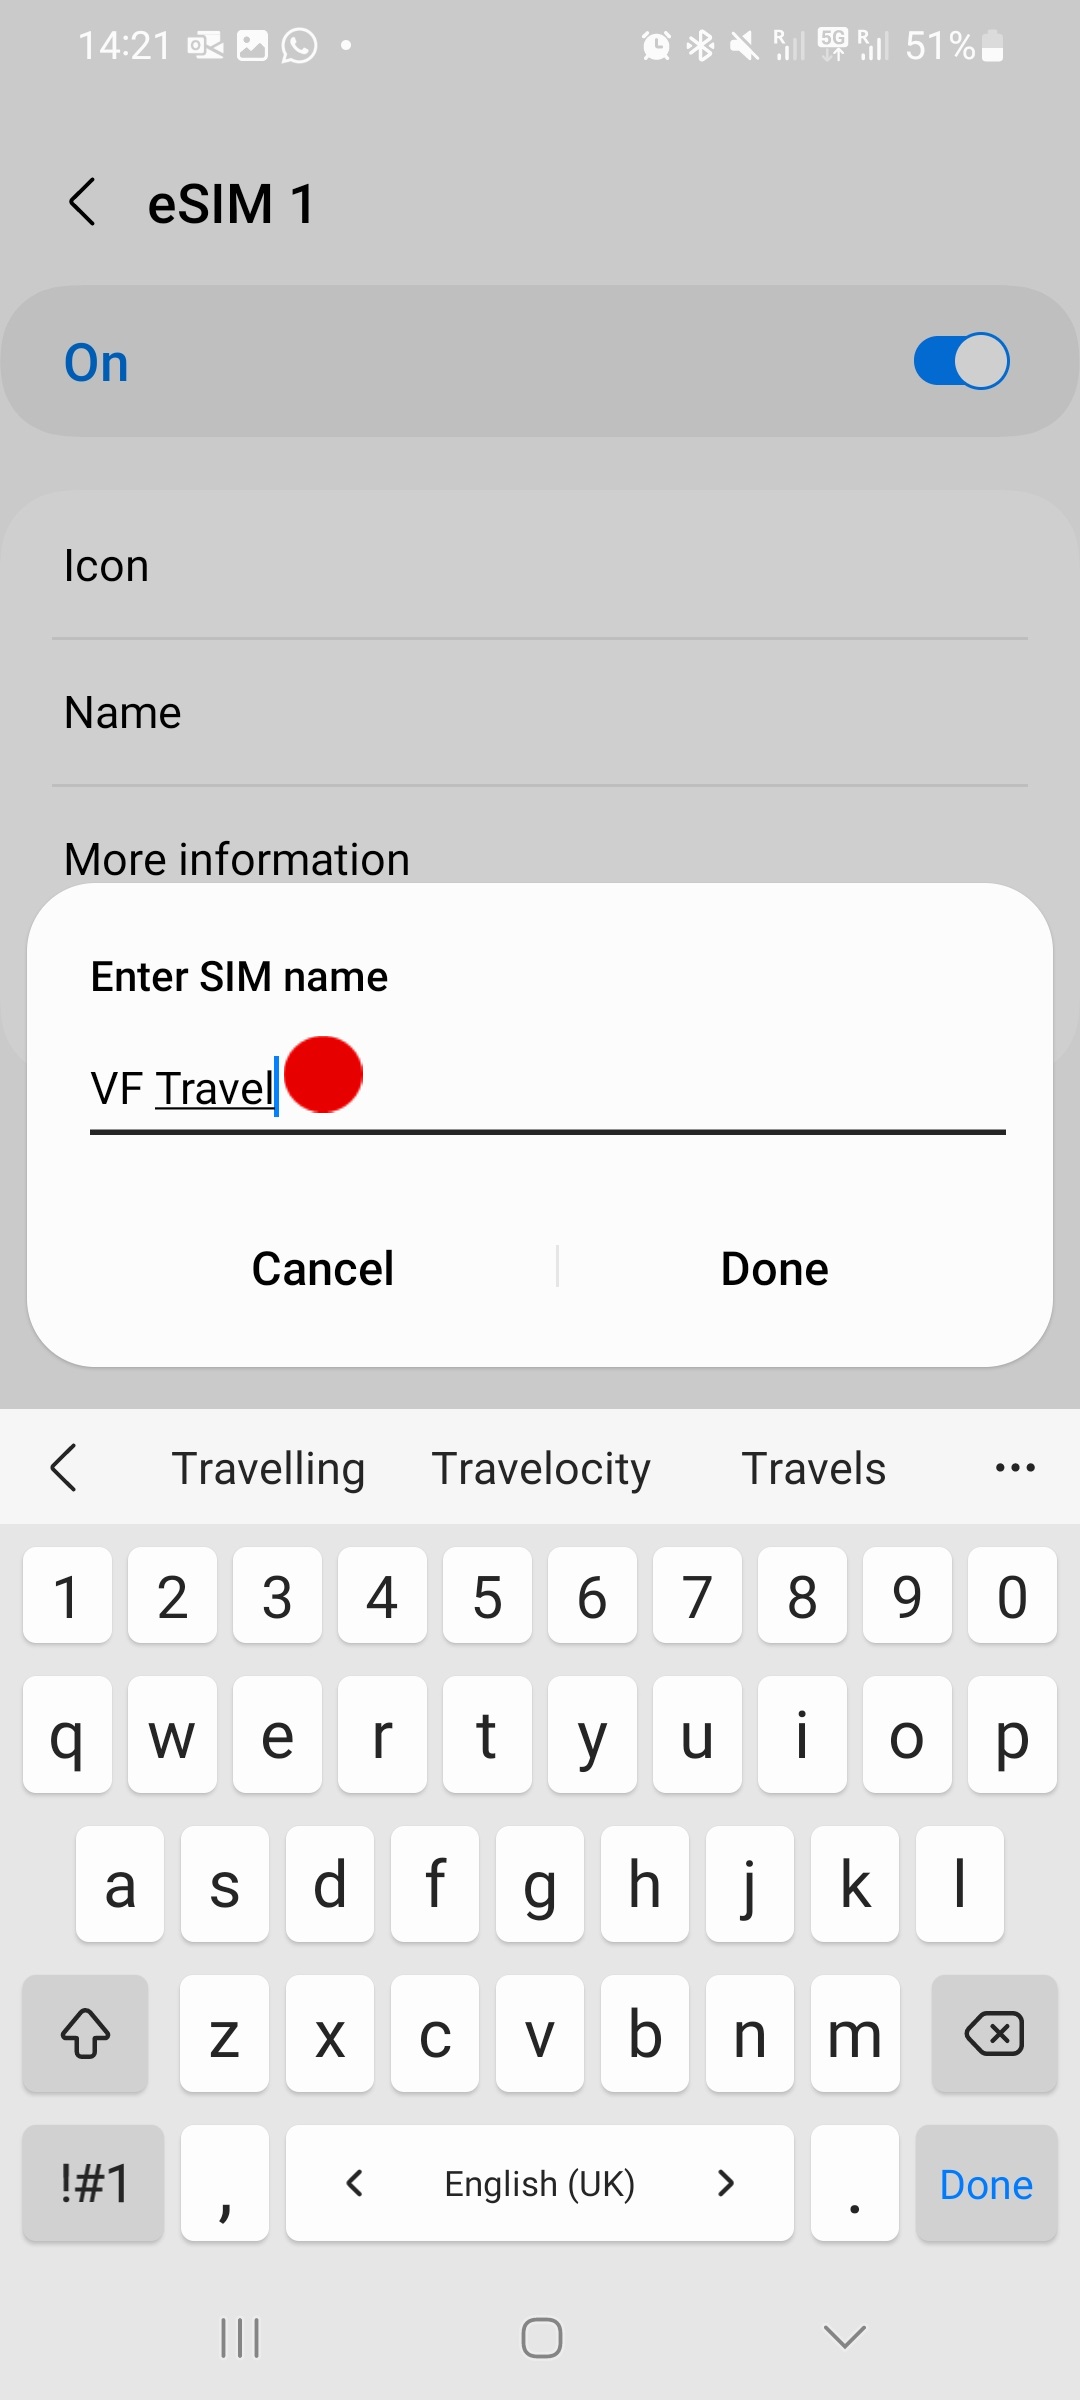
- Tap on eSIM and rename it with your desired label. We recommend using a descriptive format (ie: Airtel-Vodafone Travel).
- To activate your new eSIM, tap on 'Mobile data' and select 'eSIM'

- Before using your eSIM abroad, ensure that the 'data roaming' service is switched on. Follow these steps:
- a) Click on 'Connections' and tap on 'Mobile networks'
- b) Verify 'Data roaming' option is turned on
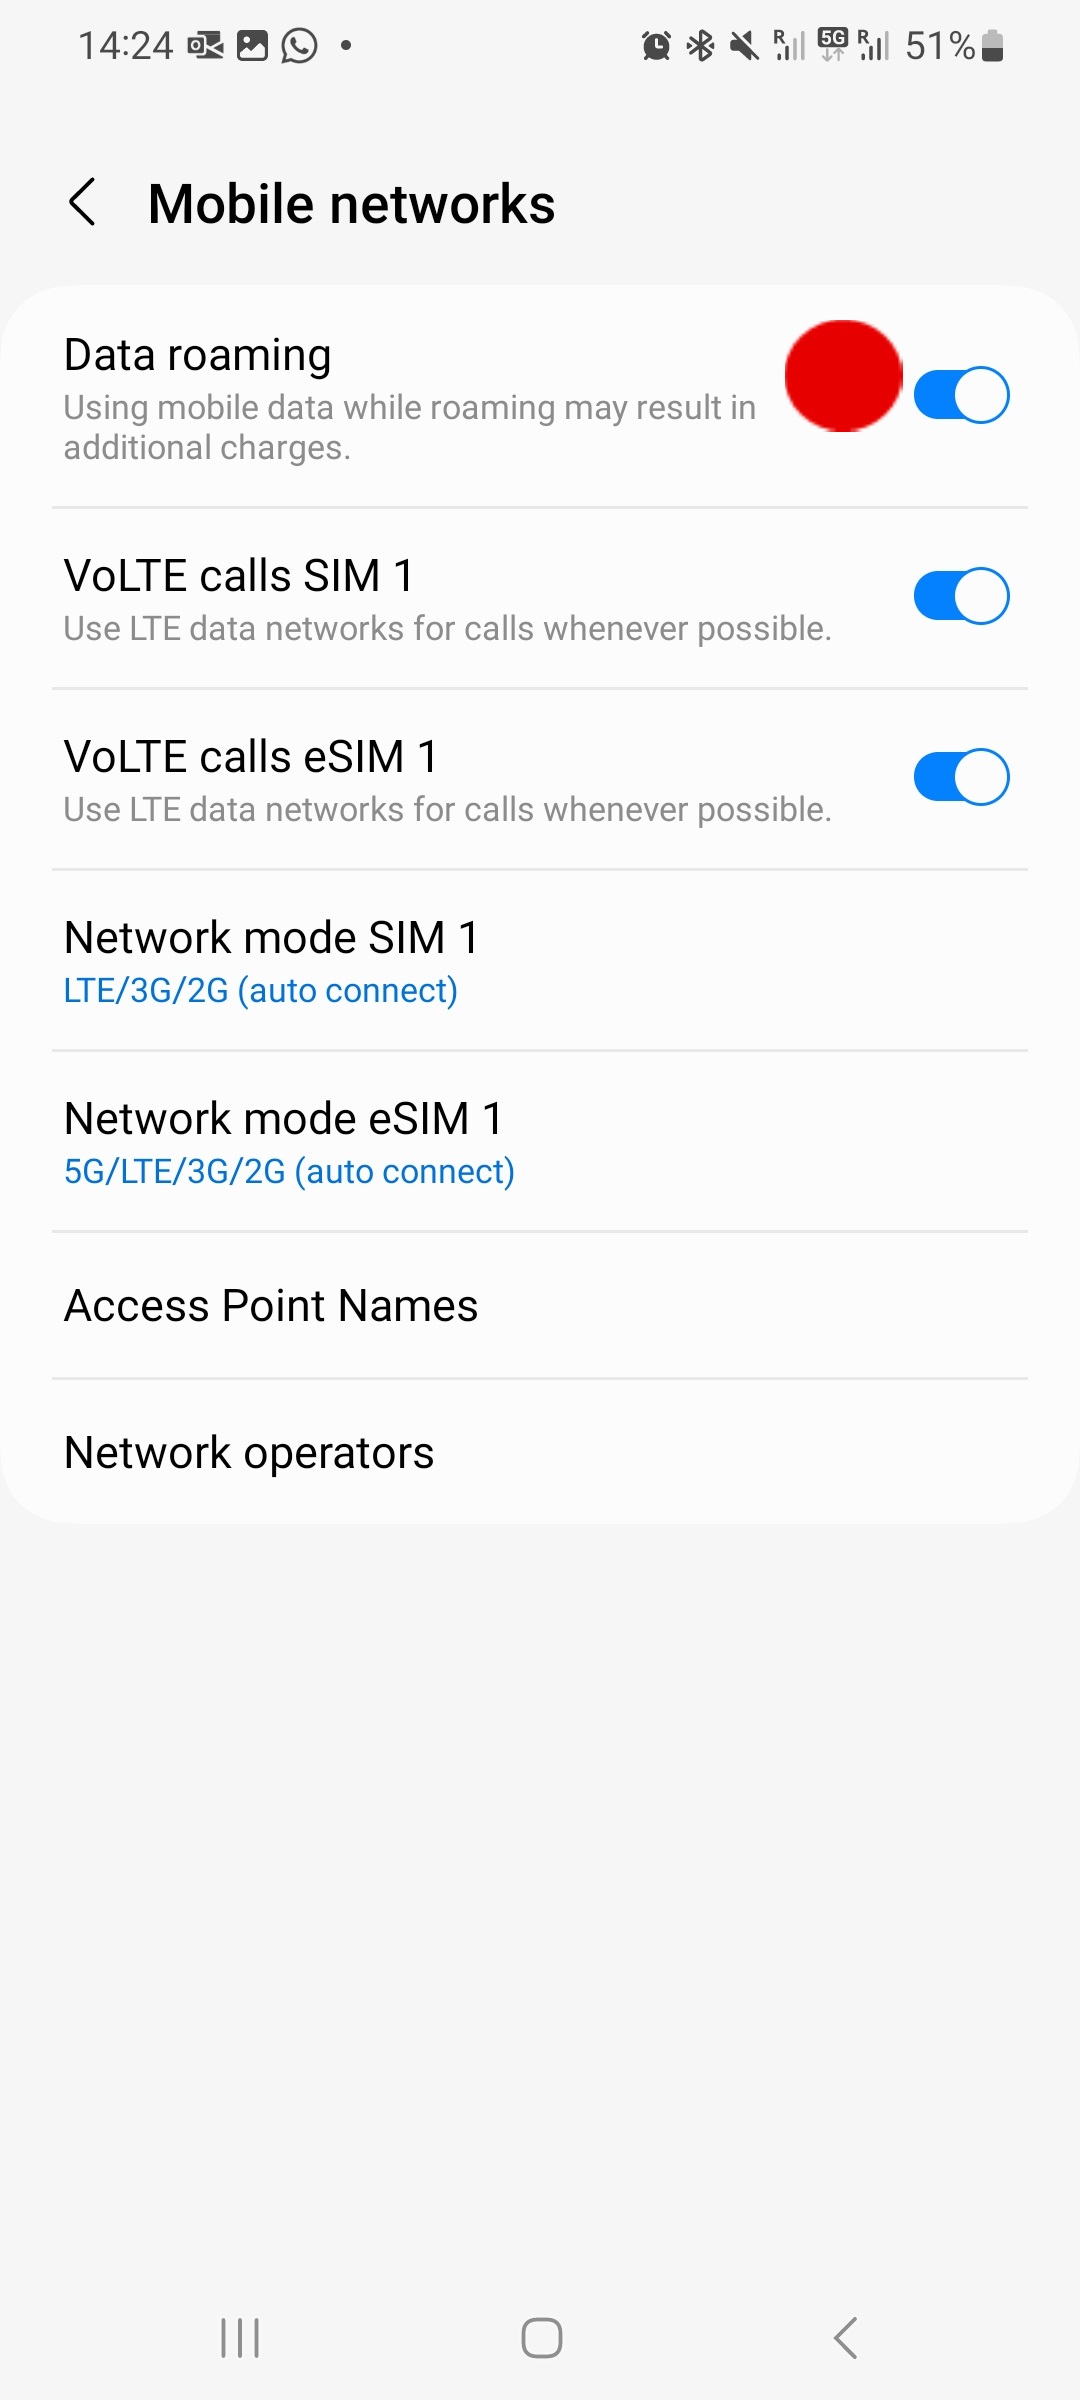
- Please note that certain Android phones may require adjustments to their APN settings to ensure seamless eSIM functionality.
- To make these changes, follow these steps: a) Go to Settings, tap 'Mobile networks' and tap on 'Access Point Names' b) Go to eSIM tab c) Select Airtel-Vodafone Internet (live.vodafone.com), or add 'travel.vrs.vodafone.nl'
Important information you need to know before you start.
Important
- Locate your eSIM details in your account or confirmation email.
- You must have the QR code on another screen or device to scan it with your phone camera.
- Make sure you have a stable internet connection throughout the process.
Install before you travel
- Open 'Settings', tap on 'Connections'

- From the 'Connections' tap on 'SIM Manager' and select 'SIM Manager'

- Select 'Add eSIM'
- Click on 'Next’ to manually install the codes received after purchase.

- Click on 'Need help?' to go into the manual entry page
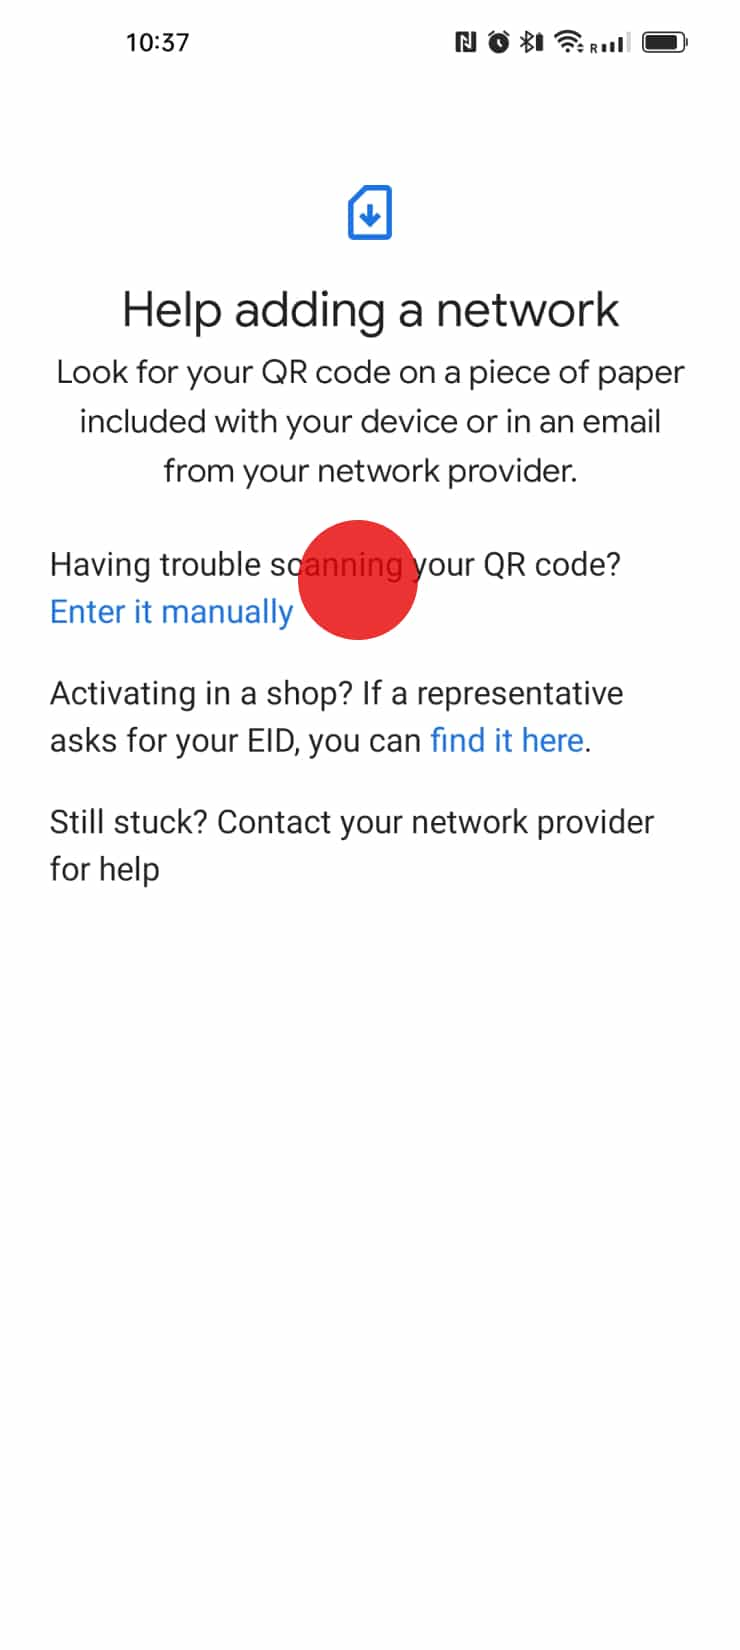
- Click on 'Enter it manually'
- Input the codes received in your email or in your account.
- Click on 'Download' to add the eSIM to your phone.
- Congratulations! Your Airtel-Vodafone eSIM is successfully installed now. Please follow the instructions on the Activation journey in order to activate your plan. We recommend you to do this during your trip or upon arrival to your destination. If you have any questions or encounter any issues, refer to the troubleshooting section or contact our support team for assistance. Enjoy your seamless travel experience with Airtel-Vodafone eSIM!

Activate upon arrival at your destination
Important
Remember to complete this configuration, otherwise you may incur roaming costs
on your original SIM
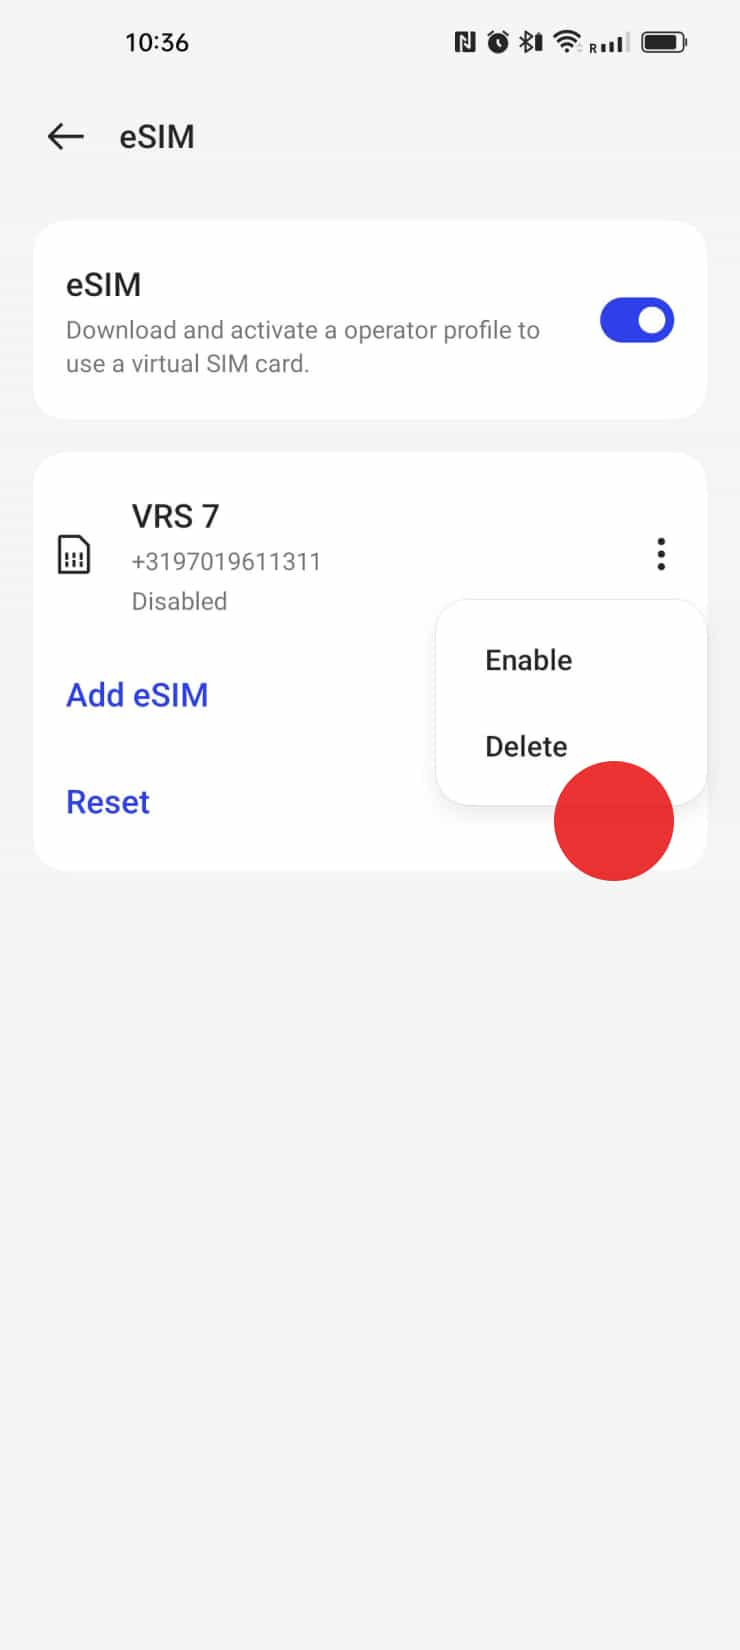
- Open the 'Settings' on your device.
- Tap on 'Connections'

- Select 'SIM Manager'
- Tap on eSIM and rename it with your desired label. We recommend using a descriptive format (ie: Airtel-Vodafone Travel).

- To activate your new eSIM, tap on 'Mobile data' and select 'eSIM'
- Before using your eSIM abroad, ensure that the 'data roaming' service is switched on. Follow these steps:
- a) Click on 'Connections' and tap on 'Mobile networks'
- b) Verify 'Data roaming' option is turned on

- Please note that certain Android phones may require adjustments to their APN settings to ensure seamless eSIM functionality.
- To make these changes, follow these steps: a) Go to Settings, tap 'Mobile networks' and tap on 'Access Point Names' b) Go to eSIM tab c) Select Airtel-Vodafone Internet (live.vodafone.com), or add 'travel.vrs.vodafone.nl'
